 Skip to content
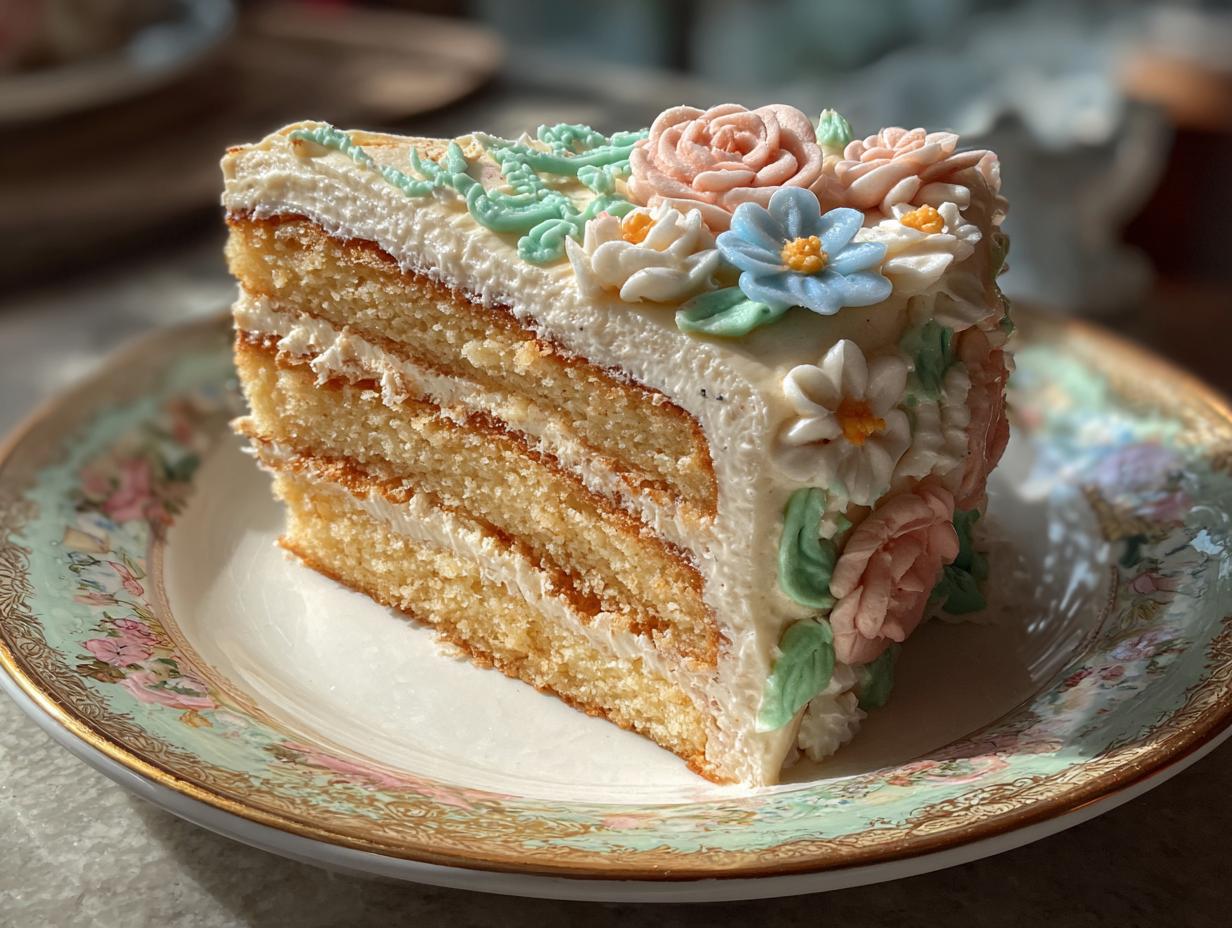
Oh, vintage birthday cakes! There’s just something so incredibly special and heartwarming about them, isn’t there? They just ooze this timeless elegance and charm that you don’t always see with modern cakes. I’ve always been drawn to that classic, almost romantic feel they have. Think of those beautiful buttercream roses, delicate piping, and those lovely pastel colors – it just takes you back! If you’re looking to bake a cake that feels truly nostalgic and utterly beautiful for a special celebration, you’ve come to the right place. We’re going to dive into how to create your own show-stopping vintage birthday cakes that will have everyone oohing and aahing!
Gathering Your Supplies for Vintage Birthday Cakes
Alright, let’s get down to business! To create these gorgeous vintage birthday cakes, we need to gather our ingredients. Don’t worry, it’s mostly pantry staples, but the quality really makes a difference here. Having everything measured out and ready to go makes the whole baking process so much smoother, trust me! It’s like setting up your artist’s palette before you start painting.
Cake Batter Ingredients for Your Vintage Birthday Cakes
For the cake itself, we’re going to need the usual suspects. Make sure your butter and eggs are at room temperature – it really helps them blend beautifully. You’ll need 1 cup (that’s two sticks!) of unsalted butter, softened just right. Then, we have 2 cups of granulated sugar, 4 large eggs, and a teaspoon of vanilla extract for that lovely aroma. For the dry stuff, grab 3 cups of all-purpose flour, 1 teaspoon of baking powder for a little lift, and half a teaspoon of salt to balance the sweetness. And finally, about 1 1/4 cups of milk to bring it all together.
Frosting and Decoration Essentials for Classic Birthday Cake Ideas
Now for the fun part – the frosting! This is where we really get to play with that classic birthday cake idea aesthetic. We’ll start with 1 cup (two sticks) of softened unsalted butter. Then, we’ll need a good amount of powdered sugar, about 4 cups, to get that fluffy texture. A quarter cup of milk and 1 teaspoon of vanilla extract will make it smooth and delicious. And of course, don’t forget your food coloring if you’re going for those pretty pastel shades! For the decorations, think piped flowers, maybe some edible pearls, whatever makes your heart sing for that vintage vibe!
How to Bake Your Stunning Vintage Birthday Cakes
Alright, let’s get these beautiful layers baked! This is where the magic really starts to happen for your vintage birthday cakes. Don’t rush through these steps; a little patience now means a perfect cake later, I promise!
Preparing the Cake Pans and Oven
First things first, let’s get that oven preheated to 350°F (175°C). While it’s warming up, grab your two 9-inch round cake pans. Give them a good grease and then a light dusting of flour. This step is super important to make sure your cakes don’t stick. You want them to pop right out, clean and pretty!
Mixing the Cake Batter for Old-Fashioned Birthday Cakes
Now for the batter! In a big bowl, cream together that softened butter and sugar. You want it to get nice and light and fluffy – this is where you build that lovely texture for your old-fashioned birthday cakes. Next, beat in your eggs, one at a time, making sure each one is well incorporated before adding the next. Then, stir in your vanilla extract. In a separate bowl, whisk together your flour, baking powder, and salt. Now, we’ll add the dry ingredients to the butter mixture in stages, alternating with the milk. Start and end with the dry ingredients. Mix until it’s just combined – seriously, don’t overmix! Overmixing can make the cake tough, and we want tender layers.
Baking and Cooling Your Vintage Birthday Cakes
Once your batter is ready, divide it evenly between those prepared pans. Smooth the tops a bit. Pop them into your preheated oven for about 30 to 35 minutes. You’ll know they’re done when a wooden skewer or toothpick inserted right into the center comes out clean. Let the cakes cool in the pans for about 10 minutes. This helps them set up a bit. Then, carefully invert them onto a wire rack to cool completely. If you try to frost a warm cake, you’ll have a melty mess, and nobody wants that!
Creating the Perfect Frosting for Your Cakes
While those cakes cool, let’s whip up the frosting. In another bowl, cream your softened butter until it’s super smooth. Then, gradually add the powdered sugar, alternating with the milk and vanilla. Keep mixing until it’s wonderfully smooth and creamy. If you’re adding food coloring for those lovely pastel shades, now’s the time to do it! Just add a drop or two at a time until you get the perfect vintage hue. This frosting is going to be the perfect canvas for all your beautiful decorations! You can find a great dairy-free frosting recipe if needed.
Decorating Your Vintage Birthday Cakes with Timeless Elegance
Now for the part that truly brings your vintage birthday cakes to life: the decorating! This is where you get to channel your inner artist and create something truly special. Don’t be intimidated; it’s all about having fun and letting that nostalgic charm shine through. Think of it as painting with buttercream! We want that elegant, handmade feel that just screams timeless beauty.
Achieving Elegant Vintage Cake Decorations
To get that elegant look, focus on soft pastel colors – think baby blues, blush pinks, mint greens, and creamy ivories. Use a piping bag with a star tip to create beautiful rosettes or delicate shells around the edges. For that extra touch of class, add a few strategically placed edible pearls or tiny piped flowers. The key is to keep it refined and not too busy. A smooth base frosting with just a few key decorative elements really makes it pop!
Tips for Rustic Vintage Birthday Cakes
If you’re leaning more towards a rustic vibe, don’t worry, vintage can be rustic too! Instead of perfect piping, try a textured buttercream finish, like a swooped or spatula effect. You can use a simpler palette, maybe just cream and white. For flowers, consider slightly more natural-looking arrangements, perhaps with a few sprigs of edible greenery. Even a simple dusting of powdered sugar can give it that charming, old-fashioned feel. It’s all about that effortless, heartfelt look!
Frequently Asked Questions About Vintage Birthday Cakes
Got questions about making these beautiful vintage birthday cakes? I totally get it! Sometimes these classic bakes can seem a little daunting, but I promise, with a few little tips, you’ll be a pro in no time. Let’s dive into some common things people ask about when creating these lovely, old-fashioned birthday cakes.
How do I ensure my vintage birthday cakes have a smooth frosting finish?
Getting that super smooth finish for your frosting is all about consistency and technique! Make sure your frosting isn’t too stiff or too runny – it should be spreadable but hold its shape. A good tip is to use an offset spatula. Start by applying a thin “crumb coat” all over the cake. This seals in any loose crumbs. Chill the cake for about 15-20 minutes, then apply a thicker, final layer of frosting. Use your offset spatula with gentle, even strokes, rotating the cake as you go. For extra smoothness, you can dip your spatula in hot water, wipe it dry, and gently smooth the frosting. It makes a world of difference! For more on frosting techniques, you might find this guide helpful.
What are some easy vintage floral birthday cake decoration ideas?
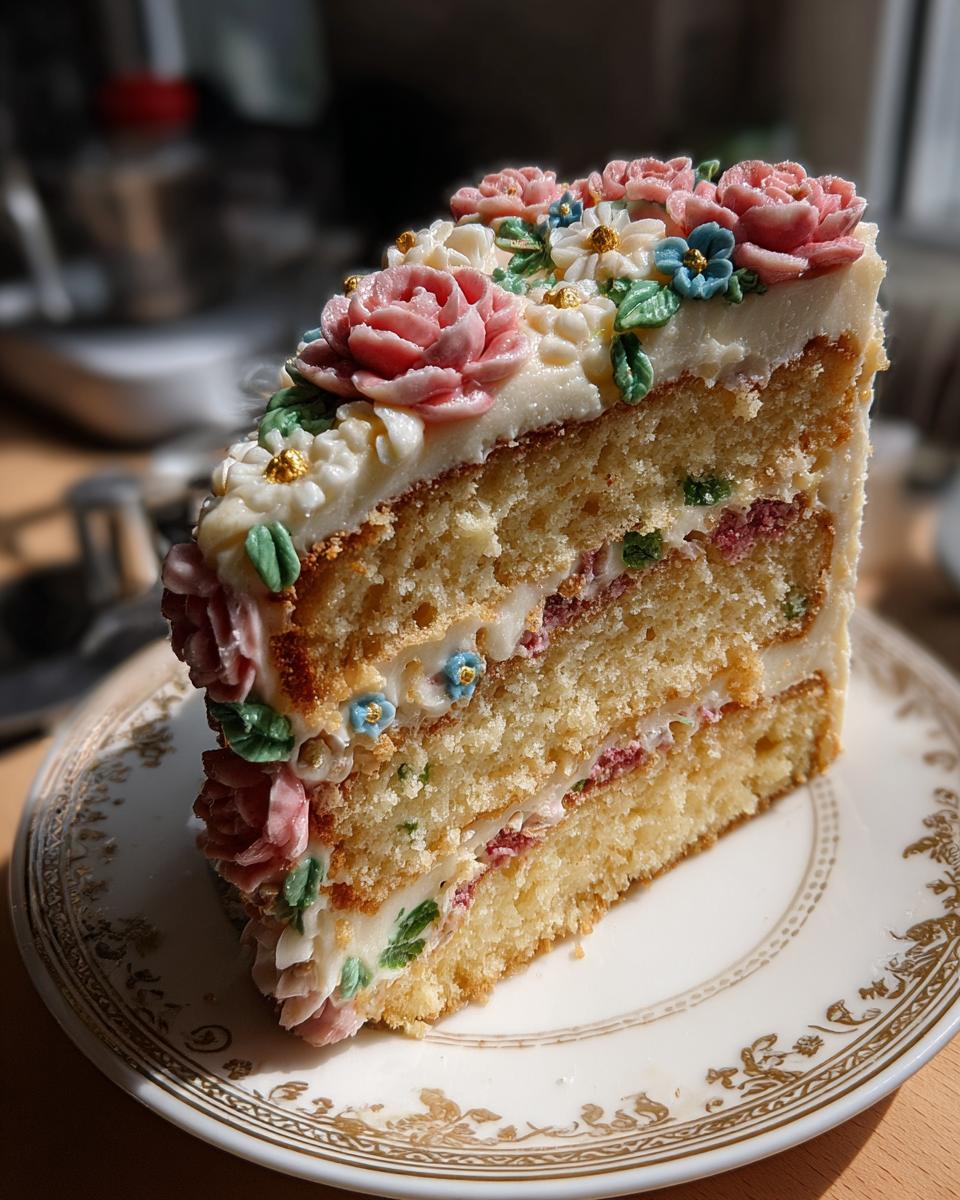
Oh, floral decorations are just *perfect* for that vintage floral birthday cake look! For an easy approach, grab a simple star tip and some buttercream. You can pipe little rosettes all over the top or around the base of the cake. Another super simple idea is to use edible flowers – think pansies, violets, or even small rosebuds. Just gently press them onto the frosted cake. You can also use a leaf tip to pipe little greenery vines around the flowers. It looks so charming and doesn’t require super fancy piping skills!
Key Information for Your Vintage Birthday Cakes
So, you’re ready to bake up some gorgeous vintage birthday cakes! It’s always handy to have the basic stats right there, so you know what you’re getting into time-wise and how much cake you’ll have. These details help you plan your baking day perfectly!
Preparation and Baking Times
Getting this beautiful cake ready is quite straightforward. You’re looking at about 30 minutes of prep time to mix up that lovely batter and get your pans ready. Then, the baking itself takes around 35 minutes. So, the total time from start to finish for the cake layers is about 1 hour and 5 minutes, not including cooling and decorating, of course!
Serving Size and Yield
This recipe is designed to make a lovely, classic two-layer cake. It yields about 12 generous servings, which is usually perfect for a birthday party or any special gathering. So, you’ll have plenty of deliciousness to go around! If you’re looking for dairy-free cookie recipes for smaller treats, we have those too.
Understanding the Nutritional Profile of Classic Birthday Cake Ideas
Now, about the nutritional stuff for these classic birthday cake ideas! The numbers you’ll see are just estimates, of course. Things like exact ingredient brands, serving sizes, and how much frosting you pile on can change them a bit. But it gives you a general idea of what you’re working with! For a healthier alternative, consider exploring gluten-free and dairy-free dessert recipes.
Print
Sweet vintage birthday cakes: A classic recipe
- Total Time: 1 hour 5 minutes
- Yield: 12 servings 1x
- Diet: Vegetarian
Description
Classic birthday cakes with a nostalgic, timeless charm. Features elegant frosting, floral decorations, and pastel colors for retro-themed celebrations.
Ingredients
- 1 cup (2 sticks) unsalted butter, softened
- 2 cups granulated sugar
- 4 large eggs
- 1 teaspoon vanilla extract
- 3 cups all-purpose flour
- 1 teaspoon baking powder
- 1/2 teaspoon salt
- 1 1/4 cups milk
- For Frosting:
- 1 cup (2 sticks) unsalted butter, softened
- 4 cups powdered sugar
- 1/4 cup milk
- 1 teaspoon vanilla extract
- Food coloring (optional)
- Decorations (piped flowers, edible pearls)
Instructions
- Preheat oven to 350°F (175°C). Grease and flour two 9-inch round cake pans.
- In a large bowl, cream together softened butter and sugar until light and fluffy.
- Beat in eggs one at a time, then stir in vanilla extract.
- In a separate bowl, whisk together flour, baking powder, and salt.
- Gradually add the dry ingredients to the wet ingredients, alternating with the milk, beginning and ending with the dry ingredients. Mix until just combined.
- Divide batter evenly between prepared pans.
- Bake for 30-35 minutes, or until a wooden skewer inserted into the center comes out clean.
- Let cakes cool in pans for 10 minutes before inverting onto a wire rack to cool completely.
- For frosting, cream softened butter until smooth.
- Gradually add powdered sugar, alternating with milk and vanilla extract, until smooth and creamy. Add food coloring if desired.
- Once cakes are completely cool, frost and decorate as desired with piped flowers and other vintage-inspired elements.
Notes
- Ensure all ingredients are at room temperature for best results.
- Do not overmix the batter.
- Allow cakes to cool completely before frosting to prevent melting.
- Get creative with your decorations to achieve a truly vintage look.
- Prep Time: 30 minutes
- Cook Time: 35 minutes
- Category: Dessert
- Method: Baking
- Cuisine: American
Nutrition
- Serving Size: 1 slice
- Calories: 450
- Sugar: 50g
- Sodium: 150mg
- Fat: 25g
- Saturated Fat: 15g
- Unsaturated Fat: 10g
- Trans Fat: 0g
- Carbohydrates: 55g
- Fiber: 1g
- Protein: 4g
- Cholesterol: 70mg
Keywords: vintage birthday cakes, retro birthday cakes, classic birthday cake ideas, antique cake designs, old-fashioned birthday cakes, vintage floral birthday cakes, 1950s style birthday cakes, elegant vintage cake decorations, rustic vintage birthday cakes, pastel birthday cake designs, birthday cakes with piped flowers