 Skip to content
Oh, Halloween! The crisp air, the spooky decorations, and of course, the *excitement* of whipping up some truly fun halloween desserts! There’s just something magical about transforming simple ingredients into little edible masterpieces that bring smiles and maybe a few shrieks (of delight, of course!). I’ve always loved how baking for this holiday lets my creativity run wild. Whether you’re planning a big bash or just a cozy night in, these recipes are designed to be your secret weapon for a memorable celebration. Get ready to dive into a world of spooky spiders, cute ghosts, and delicious flavors that everyone will adore!
Quick & Easy Halloween Desserts: Your Go-To Guide
Life gets crazy, right? Especially when Halloween rolls around and you’ve got parties to plan, costumes to wrangle, and a million other things on your plate. That’s exactly why I’m obsessed with these easy halloween desserts. You don’t need to be a master baker or spend hours slaving away to create something totally festive and delicious. These recipes are lifesavers, perfect for those last-minute party needs or when you just want a fun, quick activity with the kids. Honestly, the less fuss, the more fun you can have, and these treats deliver big on both! They prove that you can whip up some seriously impressive and quick halloween desserts without breaking a sweat. Trust me, your guests will be amazed, and you’ll feel like a Halloween hero!
Why You’ll Love These Halloween Desserts
- Effortless Fun: Seriously simple steps mean less time baking, more time enjoying the spooky season.
- Visually Stunning: They look like you spent ages on them, but they’re surprisingly easy to create!
- Kid-Approved: Little hands can help decorate, making them perfect for family activities.
- Crowd-Pleasers: Everyone loves a sweet treat, and these are always a hit at parties.
- Versatile: Easily adaptable for different themes – go spooky, cute, or a mix of both!
Halloween Dessert Recipes from Scratch: Building the Base
There’s something incredibly satisfying about making your own halloween dessert recipes from scratch, isn’t there? It’s where the real magic happens, and you get to control every little bit of flavor and texture. Plus, it means you can totally customize these cookies to be exactly what you’re dreaming of for your Halloween bash. Forget those pre-made mixes; when you bake from scratch, you’re not just making cookies, you’re creating memories. It’s a chance to really connect with the process, smell those amazing baking aromas fill your kitchen, and feel that sense of accomplishment when you pull a perfect batch out of the oven. This recipe is my go-to because it’s straightforward but yields such a wonderful, buttery cookie that’s just begging to be decorated. It’s the perfect canvas for all your spooky creations!
Essential Ingredients for Your Halloween Desserts
Okay, let’s talk ingredients! For these fantastic halloween desserts, we’re keeping it simple but using quality stuff for the best flavor. You’ll need:
- 1 cup all-purpose flour: This is the backbone of our cookie. Make sure it’s not packed too tightly in the measuring cup!
- 1/2 cup unsalted butter, softened: This is key! It needs to be soft enough to cream easily, but not melted. Leave it on the counter for about an hour before you start. Unsalted gives you control over the saltiness.
- 1/2 cup granulated sugar: For that perfect sweetness and lovely golden edge when baked.
- 1 large egg: This acts as our binder. Make sure it’s at room temperature so it incorporates smoothly into the butter and sugar mixture.
- 1 teaspoon vanilla extract: Don’t skip this! It adds that warm, comforting flavor that makes cookies irresistible.
- 1/2 teaspoon baking powder: Just enough to give the cookies a little lift without making them cakey.
- 1/4 teaspoon salt: This little pinch balances all the sweetness and really makes the flavors pop.
- Assorted Halloween-themed sprinkles and frosting: This is where the fun really begins for decorating!
Step-by-Step Instructions for Perfect Halloween Desserts
Alright, let’s get baking! It’s easier than you think, and the results are totally worth it.
- Get Ready: First things first, preheat your oven to 350°F (175°C). While that’s heating up, line your baking sheets with parchment paper. Trust me, this makes cleanup a breeze and prevents any sticking disasters.
- Cream it Up: Grab a large bowl and get your softened butter and granulated sugar in there. Beat them together until the mixture is light and fluffy. This is super important for the cookie’s texture, so don’t rush it! A stand mixer makes this easy, but a good old-fashioned hand mixer or even a sturdy whisk and some elbow grease works too.
- Add the Wet Stuff: Now, beat in your egg and the vanilla extract. Just mix until everything is nicely combined and looks smooth.
- Dry Ingredients Unite: In a separate, smaller bowl, whisk together your flour, baking powder, and salt. This just makes sure everything is evenly distributed before it goes into the wet ingredients.
- Combine Gently: Gradually add the dry ingredients to your butter-sugar-egg mixture. Mix until *just* combined. Seriously, stop mixing as soon as you don’t see any more flour streaks. Overmixing is the enemy of tender cookies!
- Scoop ‘Em Up: Drop rounded tablespoons of the dough onto your prepared baking sheets. Give them a good couple of inches of space between each one because they will spread a little.
- Bake to Golden: Pop those baking sheets into your preheated oven. Bake for about 10 to 12 minutes. You’re looking for the edges to be just lightly golden brown. Keep an eye on them; ovens can be tricky!
- Cool Down: Let the cookies hang out on the baking sheets for a few minutes after they come out of the oven. This helps them firm up a bit. Then, carefully transfer them to a wire rack to cool completely. You *must* let them cool completely before you even think about decorating, or the frosting will just melt right off!
Spooky Halloween Treats: Decoration Ideas
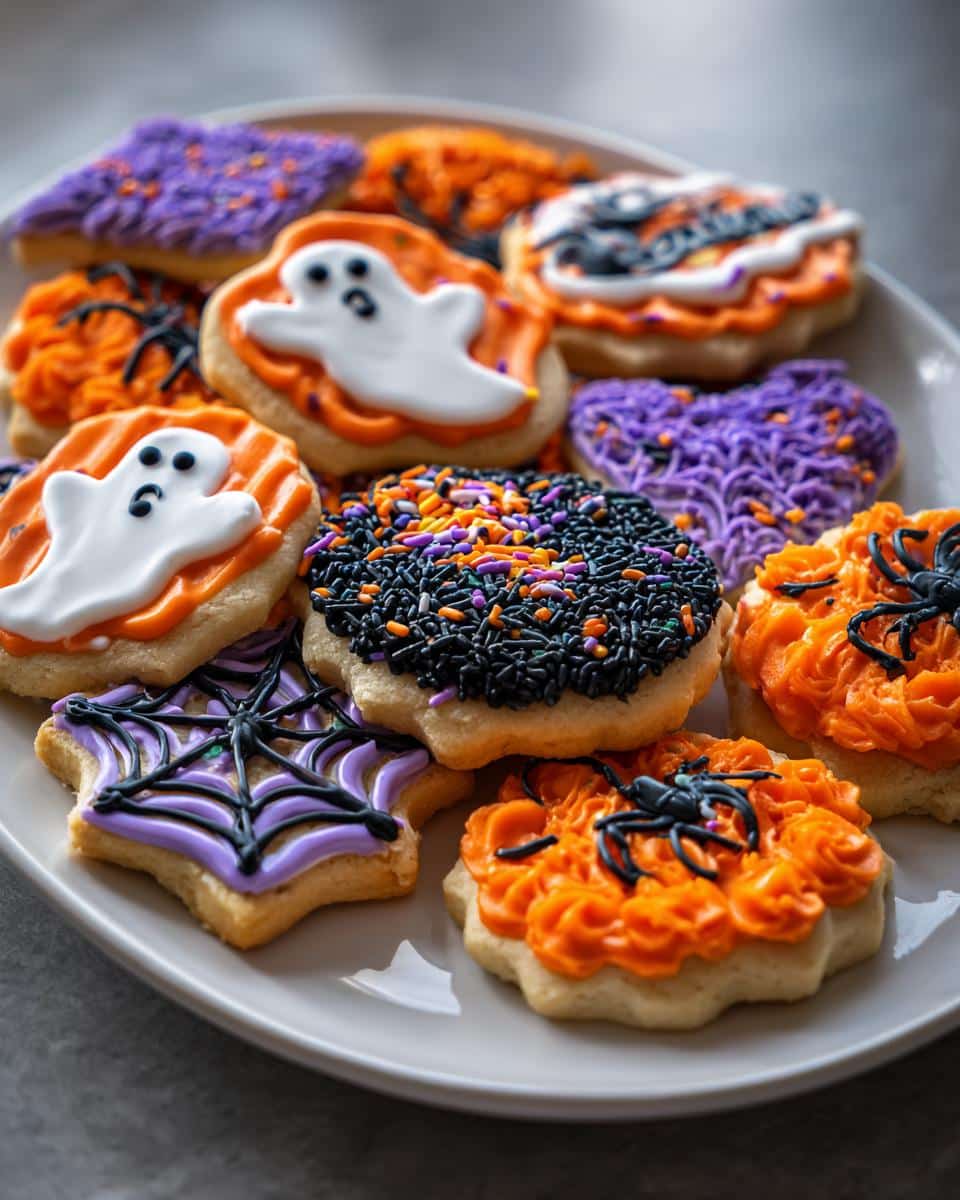
Now for my absolute favorite part – decorating! This is where your cookies transform from yummy treats into amazing spooky halloween treats. It’s so much fun, and honestly, the more creative you get, the better. Whether you’re aiming for frightfully fun or adorably cute, these ideas are perfect for little hands and big imaginations. I love seeing how a simple cookie can become a little character! These are definitely the kinds of cute halloween desserts for kids that make the holiday extra special. You can go wild with colors and shapes, and nobody will judge – that’s the beauty of Halloween baking!
Creative Decoration Techniques for Your Halloween Desserts
Getting those festive designs onto your cookies is super easy and super fun! First, make sure your cookies are completely cool. Then, grab your Halloween-themed frosting – I love using different colors like orange, black, purple, and green! For ghosts, just spread a blob of white frosting and add two little black dots for eyes. Pumpkins are as simple as spreading orange frosting and adding a little green stem on top. For spiders, pipe a black circle and then add some skinny black frosting legs. And don’t forget the sprinkles! Bat shapes, little candy eyes, or even just a sprinkle of orange and black jimmies can make a huge difference. Just have fun with it!
Halloween Party Desserts: Making Them Shine
When you’re hosting a Halloween party, the food is almost as important as the costumes! These decorated cookies are absolutely perfect for your halloween party desserts spread. They look so impressive, but you know how easy they were to make. Imagine a table filled with these festive treats – it really sets the mood and gets everyone excited. They’re fantastic because they’re individually portioned, making them super easy for guests to grab and enjoy while they mingle. Plus, they add such a fun, colorful pop to your dessert table, making it the star of the show!
Serving and Presentation Tips
To really make your decorated cookies shine at your party, think about how you display them! I love using a tiered cake stand; it adds height and makes everything look a bit more special. You could also arrange them on a big, spooky platter – think black or deep purple, maybe with some fake cobwebs or plastic spiders scattered around (carefully, so they don’t touch the cookies!). For an extra cute touch, especially if you have a lot of little ones, you can tie a little ribbon around the base of each cookie before placing it on the platter. It just adds that little bit of extra charm!
Nutritional Disclaimer for Halloween Desserts
Just a little heads-up about the nutritional info! The numbers you see are estimates, based on the ingredients and serving size listed. Keep in mind that things can vary a bit depending on the specific brands you use, how you measure things, and exactly how big you make each cookie. So, think of them as a general guide! For more information on understanding nutritional labels, you can check out resources from the FDA.
Your Halloween Dessert Questions Answered
Got questions about making these fantastic halloween desserts? I’ve got you covered! It’s totally normal to wonder about tweaks and storage, especially with holiday baking. Let’s dive into some common queries.
Can I make these gluten-free halloween desserts?
You sure can! To make these halloween desserts gluten-free, just swap out the all-purpose flour for a good quality gluten-free all-purpose baking flour blend. Make sure your blend has xanthan gum in it, as that helps with structure. You might find the dough is a little stickier, so chilling it for that 30 minutes is even more important!
How do I store leftover halloween desserts?
Storing these delicious halloween desserts is pretty simple! Once they’re completely cooled and decorated, pop them into an airtight container. They’ll keep nicely at room temperature for about 3-4 days. Just make sure the frosting is fully set before you stack them, or you might end up with a colorful mess! For more tips on storing baked goods, consider looking into resources on proper food storage techniques.
Are these halloween desserts suitable for young children?
Absolutely! These cookies are perfect for little ones. They’re soft, sweet, and the decorating part is a blast for kids. Just supervise them with the frosting and sprinkles, and maybe let them choose their own designs. They’re a wonderful way to get the whole family involved in making cute halloween desserts for kids!
Share Your Halloween Dessert Creations!
I absolutely *love* seeing what you all create in your kitchens! If you make these fun halloween desserts, please share a picture or tell me all about it in the comments below. Did you go super spooky or adorably cute with the decorations? I’d love to hear about your experience, and maybe you’ll inspire someone else with your amazing Halloween treats!
Print
Spooky Halloween Desserts: 10 Enchanting Recipes
- Total Time: 32 minutes
- Yield: 24 cookies 1x
- Diet: Vegetarian
Description
Discover a collection of festive and creative Halloween desserts. From spooky treats to cute creations for kids, find easy recipes perfect for your Halloween party or family gathering.
Ingredients
- 1 cup all-purpose flour
- 1/2 cup unsalted butter, softened
- 1/2 cup granulated sugar
- 1 large egg
- 1 teaspoon vanilla extract
- 1/2 teaspoon baking powder
- 1/4 teaspoon salt
- Assorted Halloween-themed sprinkles and frosting
Instructions
- Preheat your oven to 350°F (175°C). Line baking sheets with parchment paper.
- In a large bowl, cream together the softened butter and granulated sugar until light and fluffy.
- Beat in the egg and vanilla extract until well combined.
- In a separate bowl, whisk together the flour, baking powder, and salt.
- Gradually add the dry ingredients to the wet ingredients, mixing until just combined. Do not overmix.
- Drop rounded tablespoons of dough onto the prepared baking sheets, about 2 inches apart.
- Bake for 10-12 minutes, or until the edges are lightly golden brown.
- Let the cookies cool on the baking sheets for a few minutes before transferring them to a wire rack to cool completely.
- Once cooled, decorate the cookies with Halloween-themed frosting and sprinkles to create spooky or cute designs.
Notes
- For a crispier cookie, bake for an additional 1-2 minutes.
- You can chill the dough for 30 minutes before baking for easier handling.
- Experiment with different frosting colors and sprinkle shapes for varied Halloween themes.
- Prep Time: 20 minutes
- Cook Time: 12 minutes
- Category: Desserts
- Method: Baking
- Cuisine: American
Nutrition
- Serving Size: 1 cookie
- Calories: 150
- Sugar: 12g
- Sodium: 50mg
- Fat: 8g
- Saturated Fat: 5g
- Unsaturated Fat: 3g
- Trans Fat: 0g
- Carbohydrates: 18g
- Fiber: 1g
- Protein: 2g
- Cholesterol: 30mg
Keywords: halloween desserts, easy halloween desserts, spooky halloween treats, cute halloween desserts for kids, halloween party desserts, halloween dessert recipes, cookies