 Skip to content
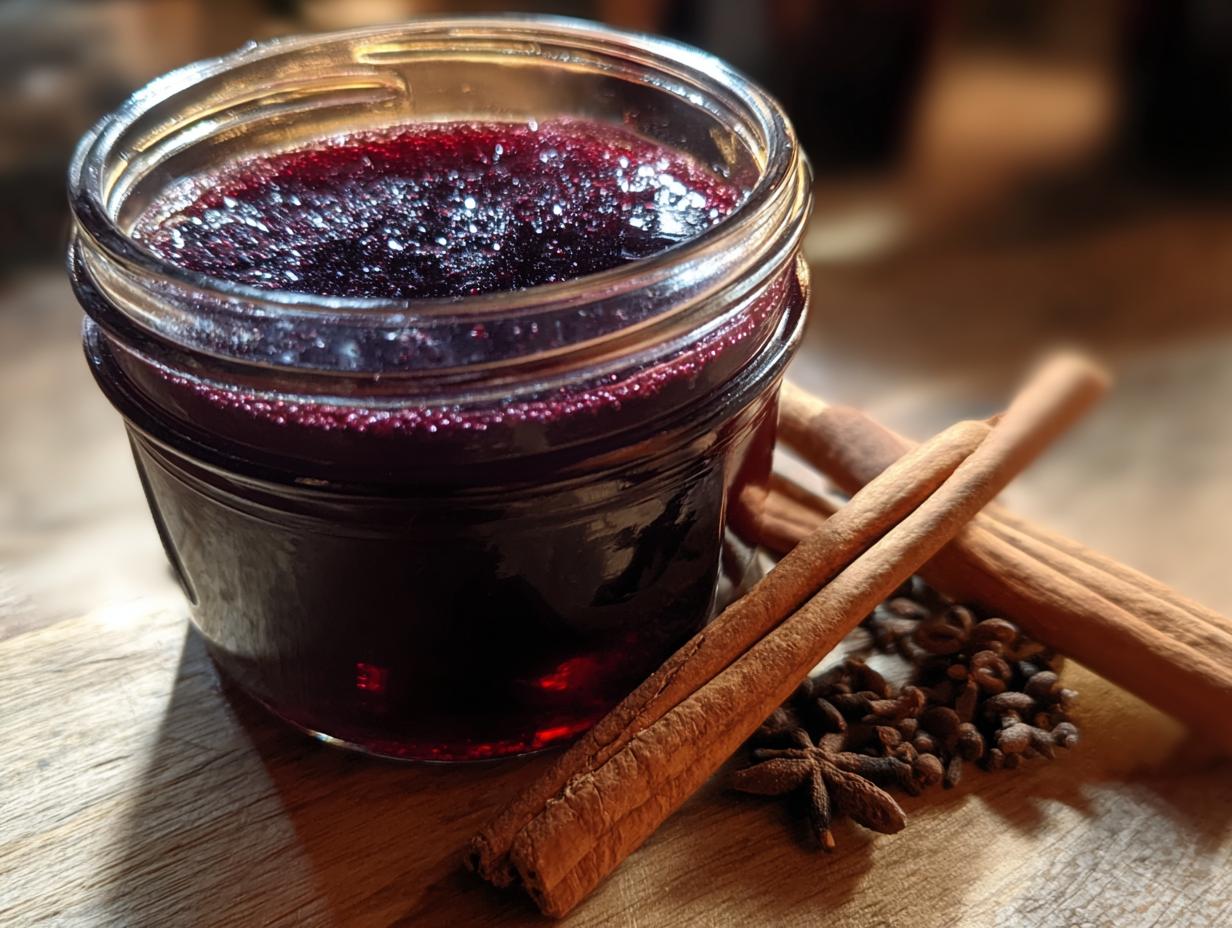
Hello there! Carmen here, straight from my sunny kitchen in Valencia. You know, we have such amazing fresh produce here, but I’ve always been drawn to the power of natural remedies, especially when the seasons start to turn. That’s why I’m so excited to share my ultimate elderberry syrup recipe with you! Forget those store-bought versions; making your own is incredibly rewarding. It’s all about harnessing the goodness of nature to support your immune system. This homemade elderberry syrup is packed with flavor and goodness. Trust me, once you make this easy elderberry syrup, you’ll wonder why you ever bought it before!
Why You’ll Love This Elderberry Syrup Recipe
This isn’t just any elderberry syrup recipe; it’s a little bottle of sunshine and wellness from my own kitchen! You’re going to adore how simple it is to whip up this homemade elderberry syrup. Here’s why it’s a winner:
- Super Easy to Make: Seriously, it’s a straightforward process that even a beginner can nail.
- All-Natural Goodness: We’re talking real elderberries, honey, and spices – no weird stuff here!
- Immune Boosting Power: It’s your go-to for natural cold remedy support.
- Deliciously Versatile: Perfect for a daily dose of immune support or a sweet treat.
- Kid-Friendly Flavor: My little ones love taking their “special syrup” thanks to the sweet honey and warming spices.
Gathering Your Ingredients for the Perfect Elderberry Syrup Recipe
Alright, let’s get our pantry ready for this amazing elderberry syrup recipe! Having the right ingredients is key, and I always believe in starting with the best quality you can find. It really makes a difference in the final taste and, of course, the goodness packed into every spoonful. We’re keeping it simple but effective, focusing on what truly matters for that immune-boosting magic.
Dried Elderberries: The Heart of Your Elderberry Syrup Recipe
For this recipe, we’ll be using 1 cup of dried elderberries. Dried berries are fantastic because they’re available year-round and concentrate their wonderful flavor and beneficial compounds so beautifully. They are truly the star of the show!
Water: The Essential Liquid for Your Elderberry Syrup Recipe
You’ll need 3 cups of water. This is what helps us extract all those lovely flavors and goodness from the elderberries and spices as they simmer away.
Honey: Natural Sweetness and Immune Support in Your Elderberry Syrup Recipe
We’re adding 1 cup of honey. I like to use a good quality local honey, but if you prefer a vegan option, 1 cup of maple syrup works wonderfully too! It’s important to stir this in only after the elderberry liquid has cooled down to lukewarm. Adding it too hot can affect the honey’s beneficial properties.
Warming Spices for Flavor and Health in Your Elderberry Syrup Recipe
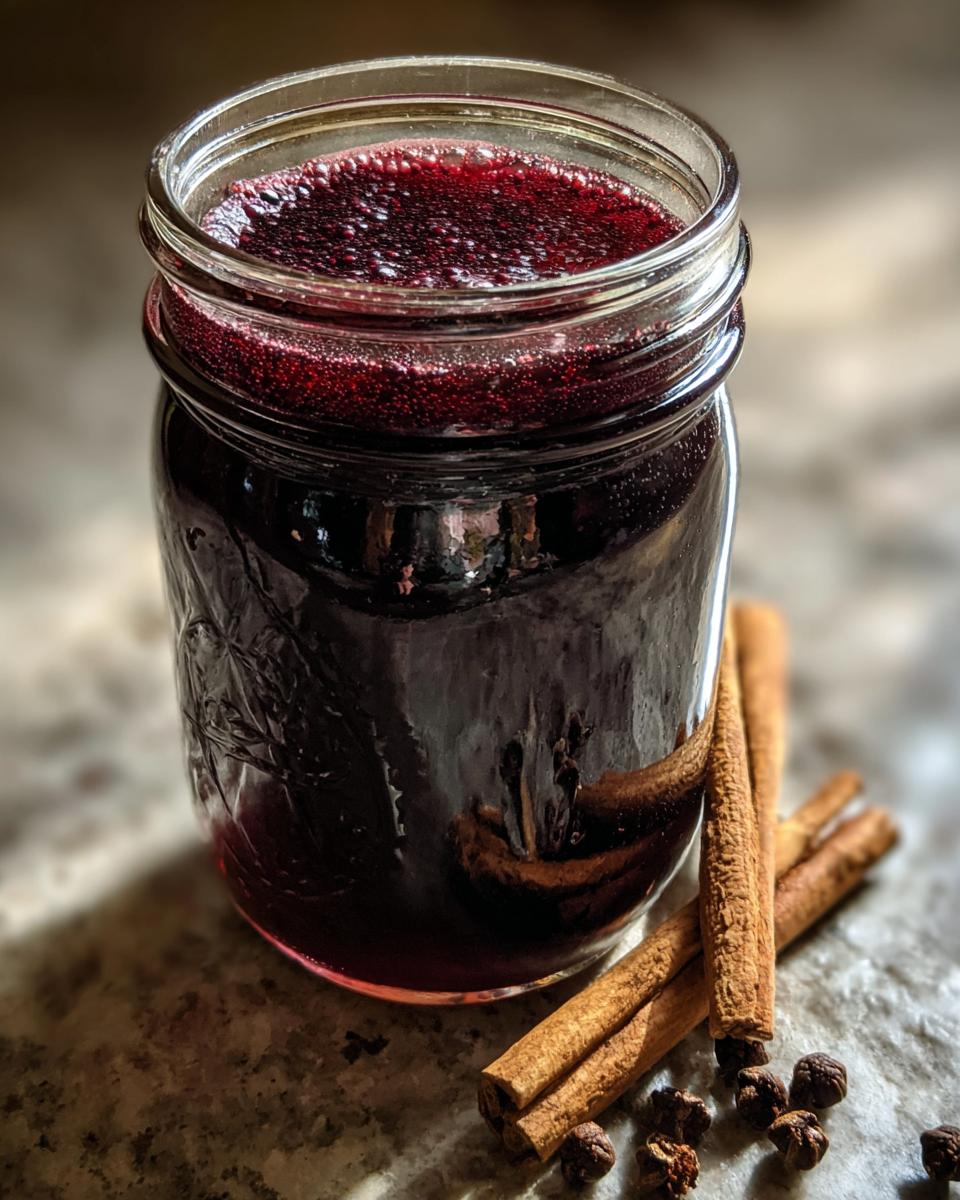
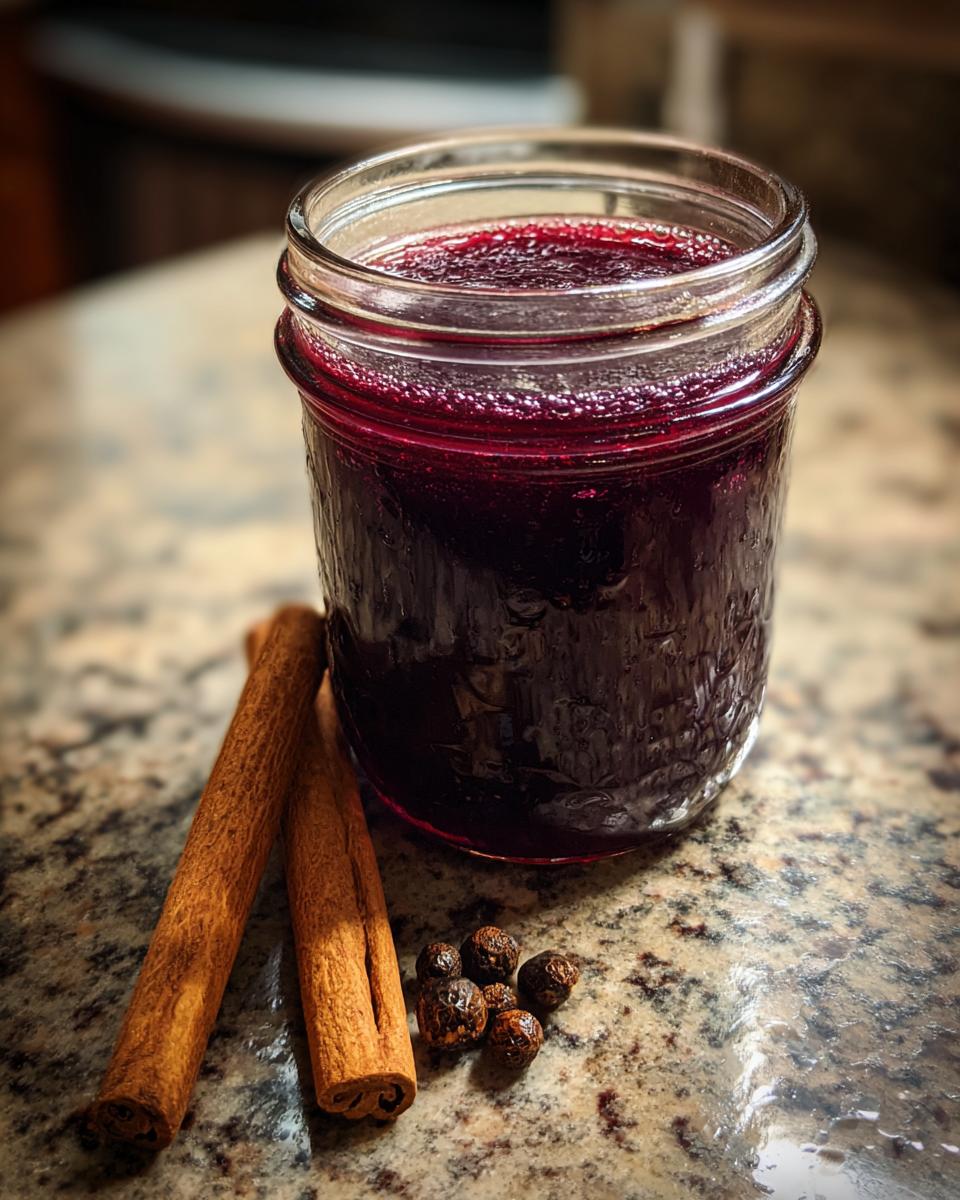
These add such a cozy, comforting layer! We’ll use 1 cinnamon stick for that classic warmth, 3 to 4 whole cloves which lend a lovely subtle spice, and about 1 teaspoon of fresh ginger, grated, for a little zing and extra immune support. They all come together to create that signature flavor we love.
How to Make Elderberry Syrup: Step-by-Step Instructions for Your Elderberry Syrup Recipe
Alright, let’s get this magic potion brewing! Making your own elderberry syrup recipe is so satisfying, and honestly, it’s not complicated at all. Just follow these simple steps, and you’ll have a beautiful, potent syrup ready to go. It’s all about patience and letting those wonderful ingredients do their thing.
Combining and Simmering the Elderberry Syrup Recipe Base
First things first, grab a medium saucepan. Toss in your 1 cup of dried elderberries, 3 cups of water, that cozy cinnamon stick, the whole cloves, and your freshly grated ginger. Give it a good stir, then bring it all to a rolling boil over medium-high heat. Once it’s bubbling away, turn the heat down to low, pop a lid on (slightly ajar is fine!), and let it simmer away for about 45 minutes to an hour. You’re looking for the liquid to reduce by about half – it’ll smell amazing!
Straining and Cooling Your Elderberry Syrup
Now, the messy but important part! Place a fine-mesh sieve over a sturdy bowl. Carefully pour your simmered elderberry mixture into the sieve. Use the back of a spoon or a spatula to gently press down on the solids. This helps coax out every last bit of that precious liquid goodness. Don’t go crazy mashing, just a gentle press will do! Once you’ve strained it all, discard the solids (or compost them!). Now, this is crucial: let the strained elderberry liquid cool down until it’s just lukewarm. Don’t rush this!
Sweetening and Storing Your Homemade Elderberry Syrup
Once your elderberry liquid is comfortably lukewarm (you should be able to touch it without burning yourself), it’s time for the sweet finish! Pour in your 1 cup of honey (or maple syrup if you’re going the vegan route) and stir it in until it’s completely dissolved and beautifully blended. Then, simply pour your lovely homemade elderberry syrup into a clean glass jar or bottle. Pop it in the fridge, and you’re all set to enjoy the benefits!
Tips for the Best Elderberry Syrup Recipe
Making this elderberry syrup recipe is pretty foolproof, but a few little tricks from my kitchen can make it even better! It’s all about those small details that really elevate the flavor and ensure you get the most out of your homemade goodness.
Achieving the Perfect Consistency for Your Elderberry Syrup Recipe
That 45-minute to 1-hour simmer is your friend here! You really want to let it reduce by about half. Don’t worry if it’s not super thick like commercial syrup; it will thicken a bit more as it cools and chills in the fridge. The goal is a pourable, slightly viscous liquid.
Sweetness Adjustments for Your Elderberry Syrup Recipe
Honey is naturally sweet, but everyone’s taste is different! If you prefer a less sweet syrup, start with a little less honey and taste it once it’s lukewarm. You can always add more. For a richer flavor, a good quality, darker honey or even a touch of molasses can be interesting additions!
Serving and Storing Your Elderberry Syrup
Now that you’ve got this gorgeous, homemade elderberry syrup, let’s talk about how to enjoy all that goodness! It’s so versatile and can be a lovely addition to your daily wellness routine. Keeping it properly stored means you can enjoy its benefits for a good long while.
How to Enjoy Your Homemade Elderberry Syrup
This elderberry syrup is fantastic straight off the spoon – about a tablespoon a day is a great way to support your immune system. I also love drizzling it over Greek yogurt, adding a splash to sparkling water for a natural soda, or even mixing it into a warm herbal tea. It’s a simple way to get a little boost!
Proper Storage for Your Elderberry Syrup Recipe
Once your delicious elderberry syrup has cooled and you’ve stirred in the honey, simply pour it into a clean glass jar or bottle. Seal it up tight and pop it straight into the refrigerator. It should stay fresh and potent for several months – usually up to 6 months if stored properly. Just make sure to use a clean spoon each time you dip in!
Frequently Asked Questions About This Elderberry Syrup Recipe
Got questions about making this DIY elderberry syrup? I’ve got you covered! It’s super common to wonder about a few things when you’re making something new, especially when it’s for your health. Let me share some insights from my own kitchen experiments.
Can I Use Fresh Elderberries for This Elderberry Syrup Recipe?
Oh, that’s a great question! While this recipe is designed for dried elderberries because they’re readily available and concentrated, you *can* use fresh ones. If you do, you’ll need about 2 cups of fresh berries, and you might want to simmer them a touch longer to get that same lovely reduction. Just make sure they’re ripe and from a trusted source!
How Long Does This Homemade Elderberry Syrup Last?
Once you’ve bottled up your delicious homemade elderberry syrup and popped it in the fridge, it’s pretty stable. It should keep beautifully for several months, usually around 6 months if you store it properly in a clean, sealed container. I like to give mine a shake before using, just in case!
What is the Best Way to Take This Immune Boosting Syrup Recipe?
This immune boosting syrup recipe is super flexible! For daily immune support, a tablespoon for adults and a teaspoon for kids is a common recommendation. Some people like to take it more often when they feel a tickle in their throat or when cold season really kicks in. You can take it straight, or mix it into a warm cup of tea or even a glass of water. It’s all about what works best for you!
Estimated Nutritional Information for Your Elderberry Syrup Recipe
Please note that the nutritional information provided is an estimate and can vary based on the specific ingredients and brands used. Things like the type of honey or maple syrup you choose can slightly alter the final numbers. My goal with this elderberry syrup recipe is always about natural goodness, so I don’t stress too much about exact figures, but it’s good to have a general idea!
Print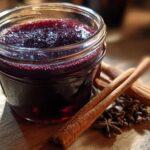
Amazing Elderberry Syrup Recipe You’ll Adore
- Total Time: 1 hour 10 minutes
- Yield: Approximately 2 cups 1x
- Diet: Vegetarian
Description
A simple and delicious recipe for homemade elderberry syrup, perfect for boosting your immune system naturally. This recipe features elderberries, honey, and warming spices.
Ingredients
- 1 cup dried elderberries
- 3 cups water
- 1 cup honey (or maple syrup for vegan option)
- 1 cinnamon stick
- 3–4 whole cloves
- 1 teaspoon fresh ginger, grated
Instructions
- Combine elderberries, water, cinnamon stick, cloves, and ginger in a saucepan.
- Bring to a boil, then reduce heat and simmer for 45 minutes to 1 hour, until the liquid has reduced by half.
- Strain the mixture through a fine-mesh sieve into a bowl, pressing gently on the solids to extract as much liquid as possible. Discard the solids.
- Let the elderberry liquid cool until it is lukewarm.
- Stir in the honey until fully combined.
- Pour the syrup into a clean glass jar or bottle.
Notes
- Store the elderberry syrup in the refrigerator.
- It will keep for several months.
- Adjust sweetness to your preference.
- Can be taken daily for immune support.
- Prep Time: 10 minutes
- Cook Time: 1 hour
- Category: Syrup
- Method: Simmering and Straining
- Cuisine: General
Nutrition
- Serving Size: 1 tablespoon
- Calories: 50
- Sugar: 12g
- Sodium: 0mg
- Fat: 0g
- Saturated Fat: 0g
- Unsaturated Fat: 0g
- Trans Fat: 0g
- Carbohydrates: 13g
- Fiber: 0g
- Protein: 0g
- Cholesterol: 0mg
Keywords: elderberry syrup recipe, homemade elderberry syrup, immune boosting syrup recipe, elderberry honey syrup, how to make elderberry syrup, natural cold remedy syrup, elderberry syrup for kids, DIY elderberry syrup, elderberry syrup with cinnamon, immune support syrup recipe, easy elderberry syrup recipe