 Skip to content
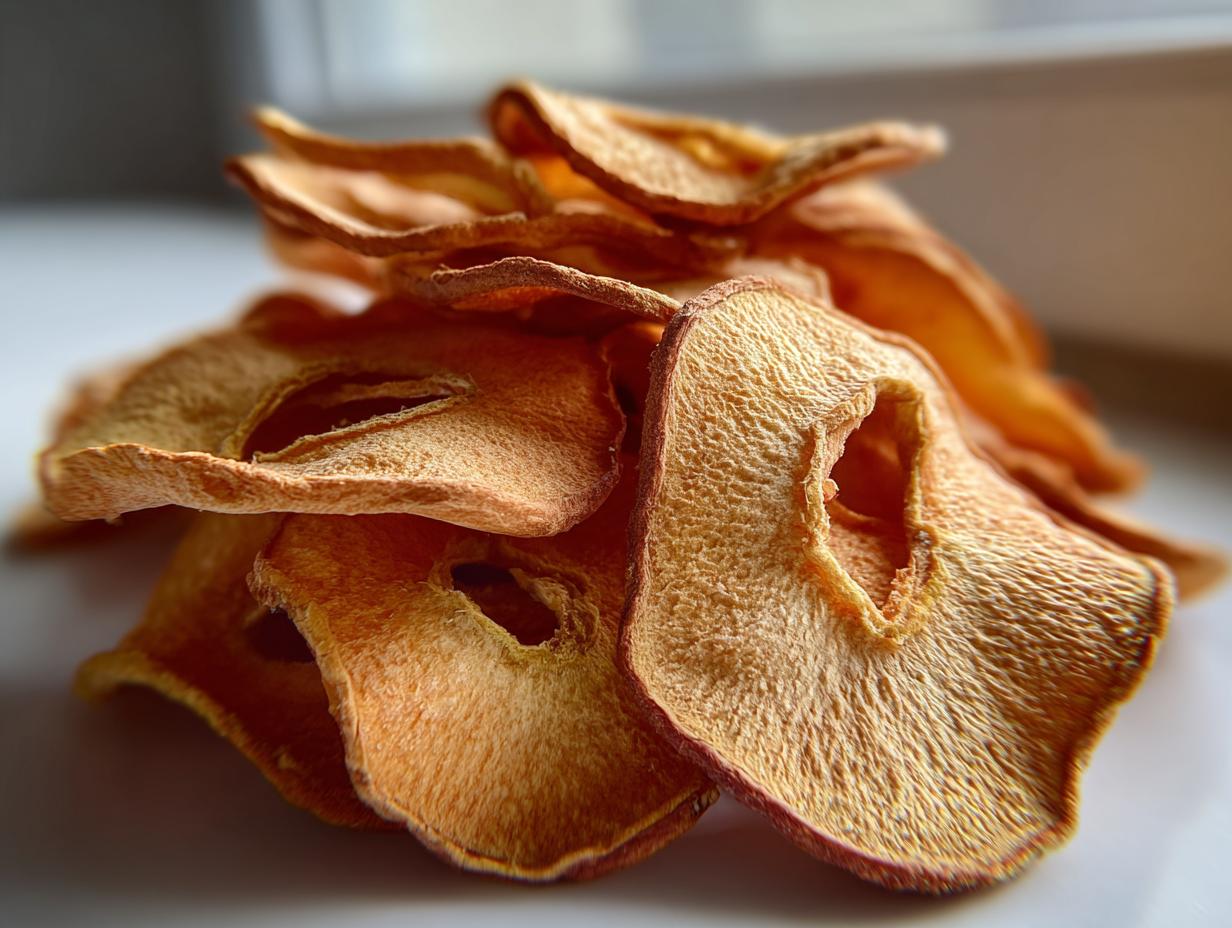
Oh, I absolutely LOVE making my own dehydrated apples! Seriously, if you’re looking for a super easy, healthy snack that tastes like pure sunshine, you’ve gotta try this. Forget those pricey store-bought bags; making your own dehydrated apples at home is so much more rewarding, and honestly, way tastier. I’ve been preserving fruits for years, and apples are always a winner. They’re naturally sweet, packed with goodness, and the process is surprisingly simple. Plus, having a stash of these chewy, flavorful apple chips ready to go? Pure magic for busy days or when you just need a little pick-me-up!
Why You’ll Love These Dehydrated Apples
Seriously, once you make these yourself, you’ll wonder why you ever bought them! They’re just so good.
- Naturally Sweet & Healthy: All the goodness of apples without any added sugars or yucky preservatives.
- Super Versatile: Perfect for munching on their own, tossing in granola, or adding to baked goods.
- Long Shelf Life: Keep a batch on hand for weeks (or even months!) for a quick snack fix.
A Healthy Alternative to Store-Bought Snacks
These homemade beauties are a fantastic way to satisfy your sweet tooth. They’re packed with natural goodness and fiber, making them a guilt-free treat compared to most processed snacks you find in the aisles.
Perfect for Meal Prep and Snacking
Whip up a batch on the weekend and you’ll have healthy snacks ready for the whole week! They’re perfect for lunchboxes, hiking trips, or just keeping in your desk drawer for that afternoon slump.
Selecting the Best Apples for Dehydrated Apples
Okay, so picking the right apples is actually a pretty big deal for getting amazing dehydrated apples. It really makes a difference in how they taste and feel when they’re all dried out. You want apples that hold their shape well and have a good balance of sweet and tart. Trust me, I’ve tried a few varieties, and some are just *chef’s kiss* better for drying. Thinking about your apple snack ideas, you’ll want to choose varieties that aren’t too mushy when cooked. Luckily, there are some fantastic options that are considered some of the best apples for drying.
Top Apple Varieties for Dehydrating
My go-to apples for dehydrating are the Fuji, Gala, and Honeycrisp. They’re naturally sweet and have a wonderful firm texture that holds up beautifully. If you love a little tang, Granny Smith is a great choice too, though I usually like to mix it with a sweeter apple for that perfect sweet-tart combo. These varieties just don’t turn into apple sauce when you dry them, which is exactly what we want!
What to Look for in Ripe Apples
When you’re at the store or farmer’s market, grab apples that feel firm to the touch and have smooth, unblemished skin. Give ’em a gentle squeeze – you don’t want any soft spots. They should smell fresh and appley, too! A good, ripe apple is the best starting point for making awesome DIY dried apples.
How to Dehydrate Apples: A Simple Step-by-Step Process
Alright, let’s get these apples dried! This is where the magic happens. Making DIY dried apples is honestly way easier than you might think, especially if you have a fruit dehydrator apples. The goal here is to get perfectly chewy, not brittle, apple chips. We’re going to break it down so it’s super simple.
Preparing Your Apples
First things first, give those apples a good wash! Then, you’ll want to core them. You can use an apple corer, or just cut around the core. The most important part here is slicing them nice and thin, and most importantly, *uniformly*. Aim for about 1/8 to 1/4 inch thick. If your slices are all different thicknesses, some will dry out too fast and become hard, while others might stay too moist. A mandoline slicer is your best friend for this, but a sharp knife works too if you’re patient!
Enhancing Flavor with Optional Additions
Now, for a little secret weapon to keep those apples looking pretty: a quick dip in some lemon juice! Just mix about 2 tablespoons of lemon juice with 2 cups of water. Toss your apple slices in this mixture for a minute or two. This helps prevent them from turning brown while they’re drying. If you’re all about that cozy apple flavor, this is also the time to sprinkle on some cinnamon. Just a light dusting is all you need to make those apple chips homemade really sing!
The Dehydrating Stage
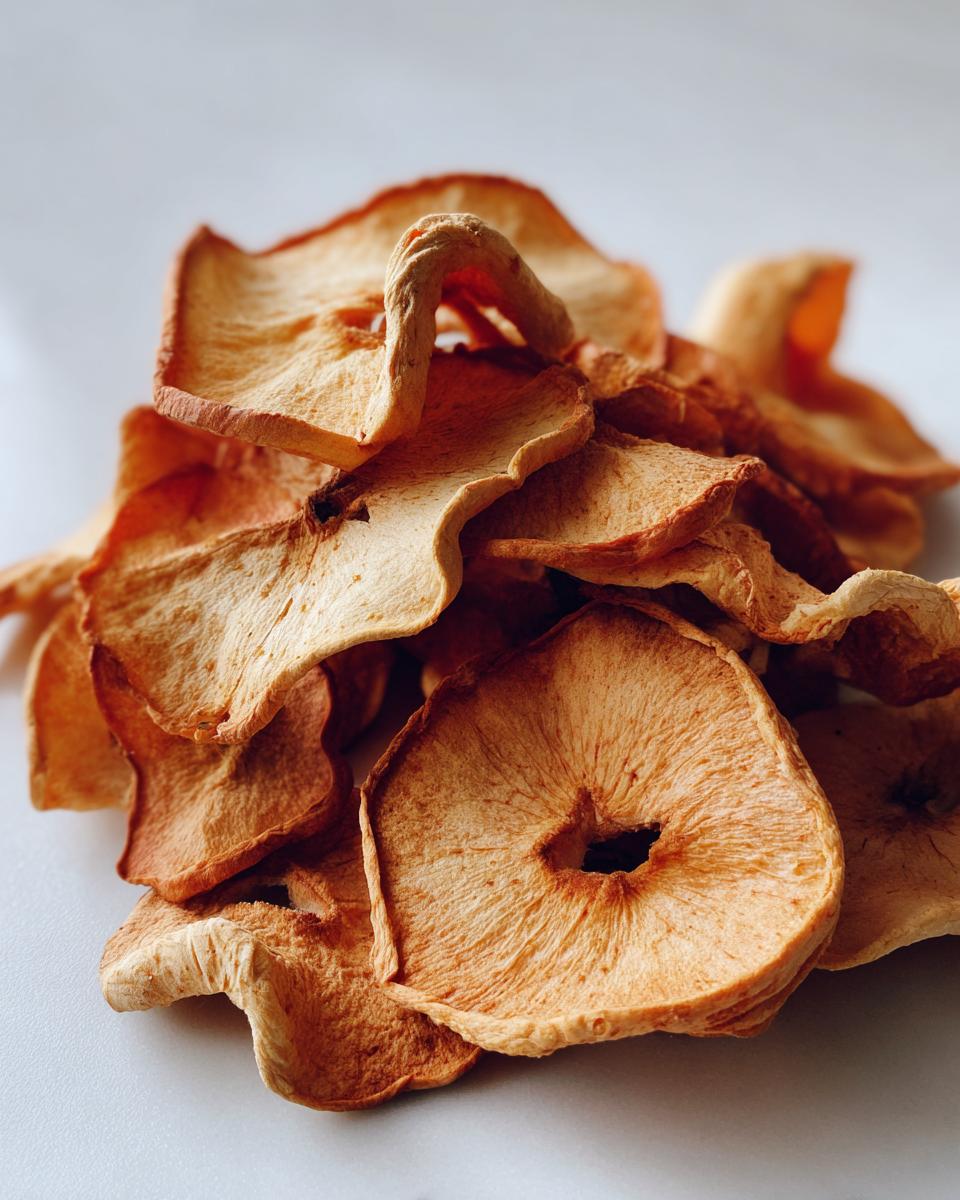
Lay your prepared apple slices in a single layer on your dehydrator trays. Make sure they aren’t overlapping, or they won’t dry evenly. Set your dehydrator to 135°F (57°C). The drying time can really vary, anywhere from 6 to 12 hours, depending on your dehydrator and how thick your slices are. You’ll know they’re ready when they’re leathery and pliable. Try bending a slice – it should be soft and bendy, not brittle or sticky.
Cooling and Storage for Dehydrated Apples
This is super important! Once they look dry, take them out and let them cool completely on the trays or a wire rack. They’ll continue to dry a bit as they cool. Once they’re totally cool, store them in airtight containers. If you don’t seal them up while they’re completely dry and cool, you might end up with condensation, which can lead to mold. We want these dehydrated apples to last!
Ingredient Notes for Dehydrated Apples
When you’re making these yummy treats, a few little details about the ingredients can really make a difference. It’s all about getting that perfect balance for your dehydrated apples. It’s really the simplest way to start preserving apples naturally right in your own kitchen!
Choosing Your Apples
Like I said before, the type of apple really matters! I love using a mix of sweet and slightly tart apples, like a Fuji or Gala paired with a Granny Smith. It gives your dried apples a bit more complexity. But honestly, any firm, ripe apple will work beautifully. Just pick what you like best!
Sweeteners and Spices
You absolutely don’t need any added sweeteners here – the apples are sweet enough on their own! The cinnamon is totally optional, but it gives them that classic cozy apple pie flavor that’s just divine. A little goes a long way, so just a light sprinkle is perfect. You could also experiment with a tiny pinch of nutmeg or allspice if you’re feeling adventurous!
Tips for Perfect Dehydrated Apples
Okay, so you’ve got your apples sliced and ready to go, but a few little tricks can make sure your dehydrated apples turn out absolutely perfect every single time. These are the things I’ve learned over the years that really help get you those amazing, chewy healthy apple snacks. They’re just so easy to make, and these tips will make your easy dehydrated fruit snacks even better!
Achieving Uniform Slices
Seriously, I can’t stress this enough: consistent thickness is key! If your slices are all over the place, some will dry out way too fast and become hard, while others might stay too chewy. Aim for about 1/8 to 1/4 inch thick. A mandoline is your best friend here, but a sharp knife and a steady hand work too!
Monitoring Your Dehydrator
Don’t just set it and forget it! Check on your apples every couple of hours, especially towards the end of the drying time. You can rotate the trays to ensure even drying, and you get a feel for how they’re progressing. This little bit of attention makes a big difference.
Avoiding Brittle Apple Chips
The goal is pliable, leathery goodness, not crisp, brittle chips (unless that’s what you’re going for!). When you think they’re done, try bending a slice. It should bend and feel slightly leathery, not snap like a potato chip. If it snaps, it needs a bit more time. If it feels sticky, it’s not dry enough, but if it bends easily, you’ve hit the sweet spot!
Creative Ways to Use Your Dehydrated Apples
Okay, so you’ve made a big ol’ batch of these amazing dehydrated apples, and now you’re wondering what to do with them all! Don’t worry, they are SO versatile. Beyond just snacking, they’re fantastic additions to so many things. These aren’t just apple snack ideas; they’re ingredients waiting to happen! I love having a jar of these on hand because they can totally elevate a simple meal or snack.
In Trail Mixes and Granola
This is a no-brainer! Toss a handful of your homemade dried apples into your favorite trail mix recipe. They add a lovely chewy texture and natural sweetness that’s way better than candy. They also fold perfectly into homemade granola for a delightful fruity crunch.
Baked Goods and Desserts
Want to give your muffins, cookies, or even a pie a little something extra? Rehydrate a few dried apples by soaking them in warm water for about 10 minutes, drain them, and then chop them up. They’ll add a wonderful concentrated apple flavor and texture to your baked goods. It’s like having little bursts of apple pie in every bite! For more delicious dessert ideas, check out our dairy-free dessert recipes.
As a Healthy Snack on Their Own
Honestly, my favorite way to eat them is straight from the jar! They’re chewy, satisfying, and perfectly sweet. They make such a great grab-and-go snack when you need something quick and healthy. You really don’t need anything else when you have these delicious dehydrated apple recipes right at your fingertips!
Frequently Asked Questions about Dehydrated Apples
Got questions about making your own dehydrated apples? I’ve got you covered! It’s a pretty straightforward process, but sometimes a few things pop up.
How long do dehydrated apples last?
If you store them properly in an airtight container in a cool, dark place, they can last for several months, even up to a year! Just make sure they are completely dry and cool before sealing them up. Honestly, they usually disappear way before that in my house!
Can I dehydrate apples without a dehydrator?
You sure can! An oven works too. Set your oven to the lowest possible temperature (usually around 170°F or 75°C), line baking sheets with parchment paper, arrange your apple slices, and bake them for several hours, propping the oven door open slightly to let moisture escape. It takes a bit more watching, but it’s totally doable! For more tips on preserving food, you can explore resources on dehydrating fruits.
What is the best temperature for dehydrating apples?
For most dehydrators, 135°F (57°C) is the sweet spot. It’s hot enough to dry them out safely and efficiently without cooking them, which preserves those lovely nutrients and that chewy texture. Just make sure your dehydrator can hold a steady temp!
Why are my dehydrated apples turning brown?
That usually happens due to oxidation if you didn’t use lemon juice or if the apples weren’t fully submerged in it. Don’t worry too much, though! They’ll still taste great. Using that lemon juice trick really helps keep them looking vibrant, which is nice for presentation, especially if you’re making them for gifts or sharing.
Nutritional Information for Dehydrated Apples
These numbers are pretty much an estimate, since every apple is different and how long you dehydrate them can change things up a bit. But as a general idea, a 1-ounce serving (that’s about 28 grams) of these delicious dehydrated apples usually packs around 80 to 100 calories. You’re looking at about 20-25 grams of carbohydrates, with 15-20 grams of that being natural sugar from the fruit. They’re also a good source of fiber, usually around 3-4 grams, and have virtually no fat or sodium. It’s just pure, wholesome apple goodness!
Share Your Dehydrated Apple Creations
I just LOVE hearing from you all! Have you tried making these dehydrated apples? What are your favorite ways to use them? Drop a comment below and tell me all about your experience, or even rate the recipe! I can’t wait to see what delicious things you create!
Print
Dehydrated Apples: 1 Simple Treat You’ll Love
- Total Time: 6 hours 15 minutes to 12 hours 15 minutes
- Yield: Varies based on apple size and dehydration loss
- Diet: Vegetarian
Description
Learn how to make delicious and healthy dehydrated apples at home. This guide covers everything from selecting the best apples to storage tips, perfect for snacks and recipes.
Ingredients
- Apples (e.g., Fuji, Gala, Honeycrisp)
- Optional: Cinnamon, lemon juice
Instructions
- Wash and core your apples.
- Slice apples thinly and uniformly.
- (Optional) Toss with a little lemon juice to prevent browning.
- (Optional) Sprinkle with cinnamon for added flavor.
- Arrange apple slices in a single layer on dehydrator trays.
- Dehydrate at 135°F (57°C) for 6-12 hours, or until leathery and dry.
- Cool completely before storing.
Notes
- Choose firm, ripe apples for best results.
- Ensure slices are of even thickness for uniform drying.
- Store in airtight containers in a cool, dark place.
- Check for dryness by trying to bend a slice; it should be pliable, not brittle.
- Prep Time: 15 minutes
- Cook Time: 6-12 hours
- Category: Snacks/Preservation
- Method: Dehydrating
- Cuisine: General
Nutrition
- Serving Size: 1 ounce (approx. 28g)
- Calories: 80-100
- Sugar: 15-20g
- Sodium: 1-5mg
- Fat: 0g
- Saturated Fat: 0g
- Unsaturated Fat: 0g
- Trans Fat: 0g
- Carbohydrates: 20-25g
- Fiber: 3-4g
- Protein: 0-1g
- Cholesterol: 0mg
Keywords: dehydrated apples, how to dehydrate apples, dehydrated apple recipes, healthy apple snacks, DIY dried apples, fruit dehydrator apples, apple chips homemade, preserving apples naturally, easy dehydrated fruit snacks, apple snack ideas, best apples for drying