 Skip to content
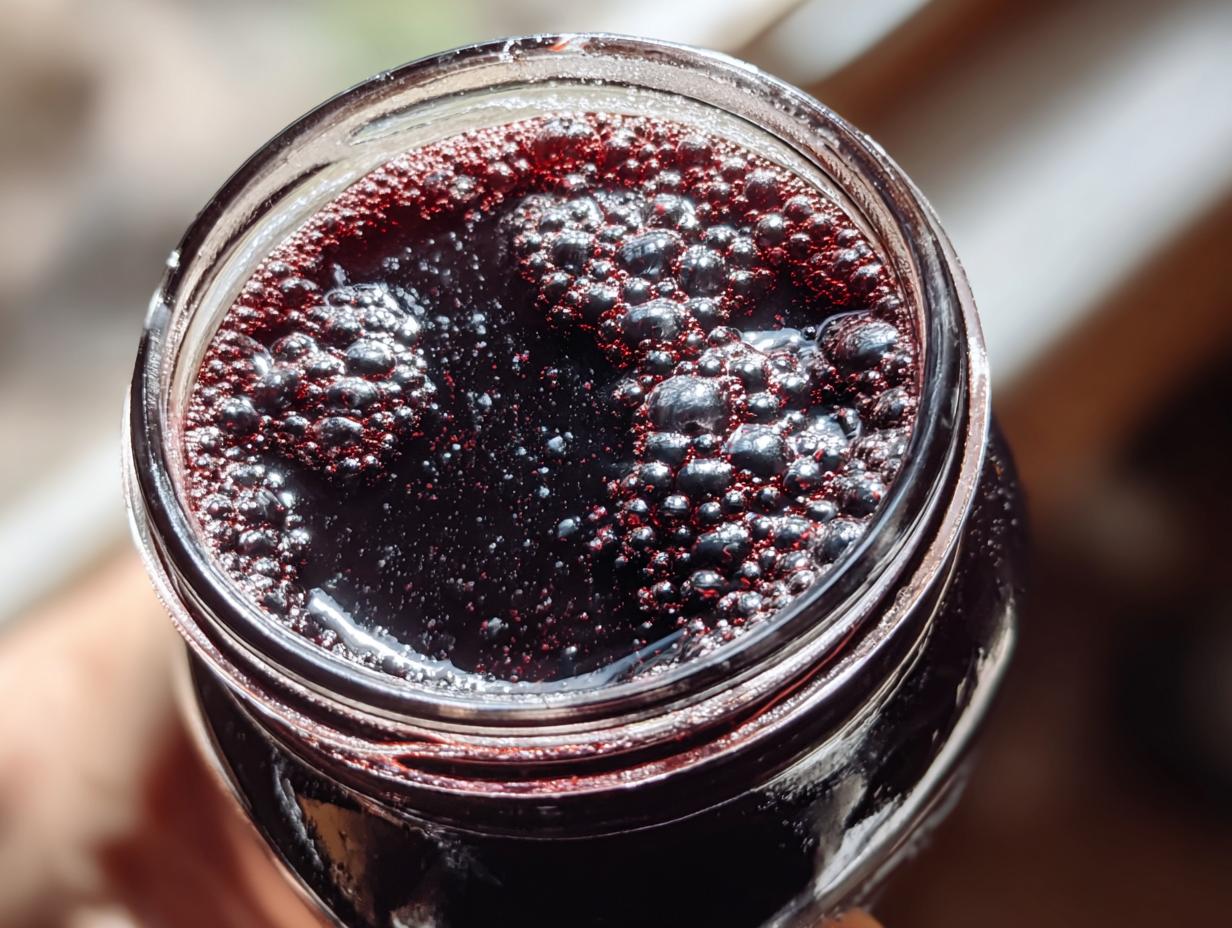
Hey there! As a chef who’s spent years in my sunny Valencia kitchen, I’ve always been drawn to the power of natural ingredients. Living in Spain, we know a thing or two about fresh, wholesome food! That’s why I’m so excited to share my absolute favorite way to create homemade elderberry syrup. It’s a simple, beautiful way to support your well-being, especially when those sniffles start creeping in. Trust me, this elderberry syrup is a kitchen staple you’ll want to keep on hand!
Why You’ll Love This Elderberry Syrup Recipe
Seriously, this elderberry syrup recipe is a dream! You’re going to love how:
- It’s super easy to whip up.
- It’s fantastic for giving your immune system a little boost.
- You’re using all-natural ingredients – so good!
- It tastes absolutely delicious, with just the right mix of sweet and spice.
- It’s your new go-to for the cold and flu season.
- It’s even great for the kiddos!
- And, it makes for such a thoughtful homemade gift!
Expert Tips for Making the Perfect Elderberry Syrup
Making your own elderberry syrup is so rewarding, and a few little tricks really make it shine. My goal is always to get that perfect balance of flavor and goodness, and I want you to have the same success! Don’t worry if it seems a bit fiddly at first; once you know these secrets, you’ll be an elderberry pro.
Selecting the Best Elderberries for Your Syrup
Okay, this is super important, so listen up! You absolutely *must* use dried elderberries for this recipe. Fresh elderberries? They can actually be a little toxic if not prepared *just* right, and honestly, it’s just not worth the risk when dried ones work so beautifully. Stick to the dried stuff; it’s safer and gives you that lovely, concentrated flavor for your homemade elderberry syrup.
The Role of Honey in Your Elderberry Syrup
Honey isn’t just for sweetness here; it’s a real powerhouse! I always reach for raw honey because it hasn’t been heated, so all those amazing beneficial properties are still there. The trick, though, is to add it *after* the syrup has cooled down a bit. If it’s too hot, you can damage the good stuff in the honey. Just let it get warm, then stir in that gorgeous honey until it’s all smooth and lovely. It adds sweetness, helps preserve the syrup, and makes it taste divine!
Ingredients for Your Homemade Elderberry Syrup
Alright, let’s talk about what you’ll need to make this fantastic elderberry syrup! It’s really just a handful of simple things that come together so beautifully. Having everything prepped and ready makes the whole process even smoother, so you can get to that delicious final product faster. You’ll see that the ingredient list is pretty straightforward, focusing on quality and flavor.
Essential Ingredients List
Here’s what you’ll gather for your homemade elderberry syrup:
- 1 cup dried elderberries: Make sure they’re good quality!
- 3 cups water: Just plain water is perfect.
- 1 cup raw honey: This is key for flavor and all those good properties.
- 1 cinnamon stick: For that warm, cozy spice.
- 3 whole cloves: Just a few add a lovely depth.
- 1 inch fresh ginger, sliced: Gives it a little zing!
Step-by-Step Instructions for Making Elderberry Syrup
Alright, let’s get this elderberry syrup party started! It’s actually pretty fun to watch everything come together. I love doing this on a quiet afternoon; the kitchen fills with the most amazing aromas. Just follow these steps, and you’ll have your own gorgeous, homemade elderberry syrup in no time.
Simmering and Steeping Your Elderberry Mixture
First things first, grab a medium-sized saucepan. Toss in your dried elderberries, the water, that cinnamon stick, those whole cloves, and the sliced fresh ginger. Give it a little stir, then pop it on the stove over medium-high heat until it comes to a rolling boil. Once it’s bubbling away, turn the heat down to low, cover it loosely, and let it simmer gently for about 30 to 45 minutes. You’ll notice the liquid reducing and getting nice and syrupy. After simmering, take it off the heat and let it just sit there, steeping for another 10 to 15 minutes. This is where all that wonderful flavor really gets infused!
Straining and Cooling Your Elderberry Syrup
Now, grab a fine-mesh sieve – the finer the better for this! Place it over a clean bowl or another pot. Carefully pour your elderberry mixture through the sieve. You can gently press down on the solids with the back of a spoon to get every last bit of that precious liquid out. Don’t go crazy mashing it, though; we just want the juice! Once you’ve strained it all, discard the solids (or compost them!). Let that lovely liquid cool down. It needs to be just warm, not piping hot, before we move to the next step. Patience here is key!
Adding Honey and Storing Your Elderberry Syrup
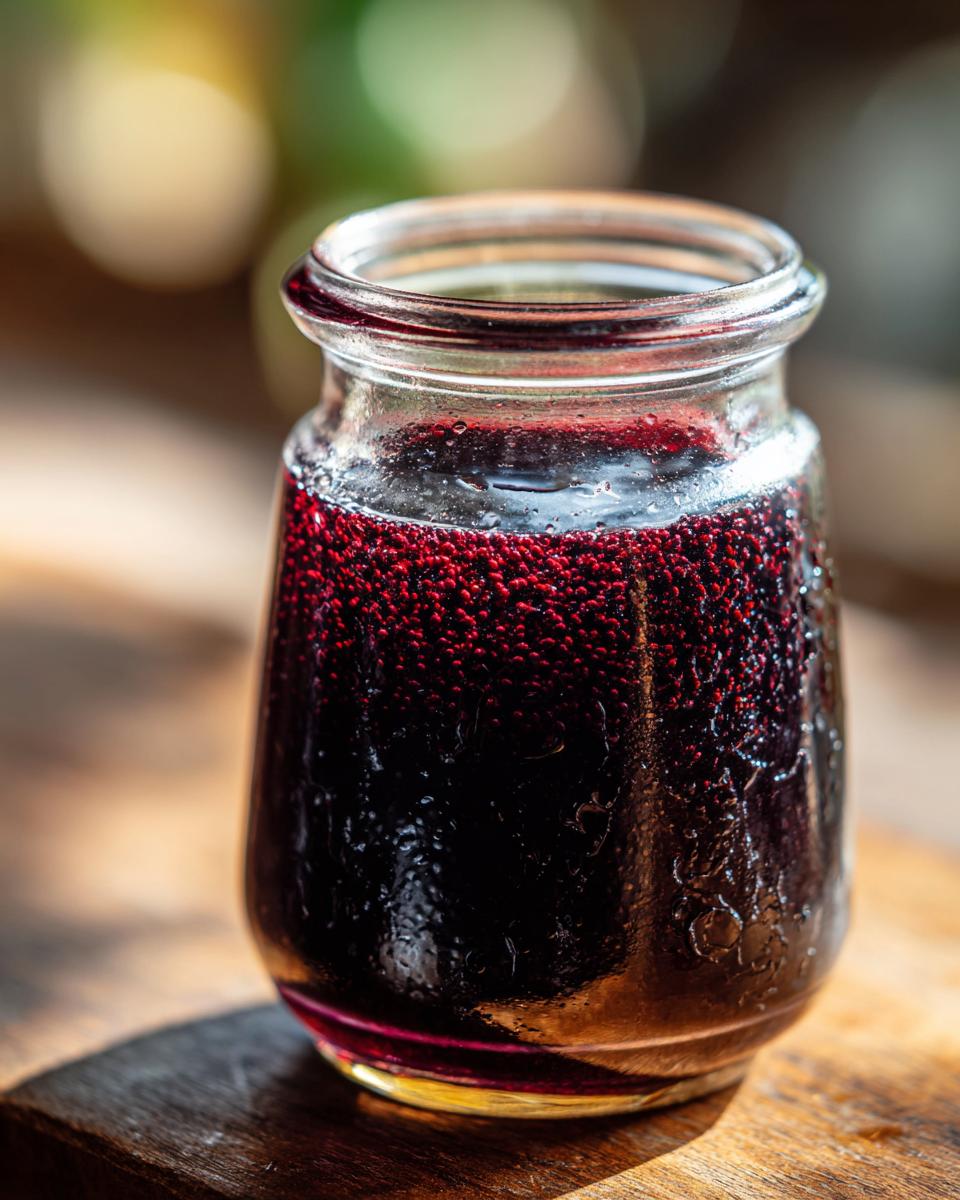
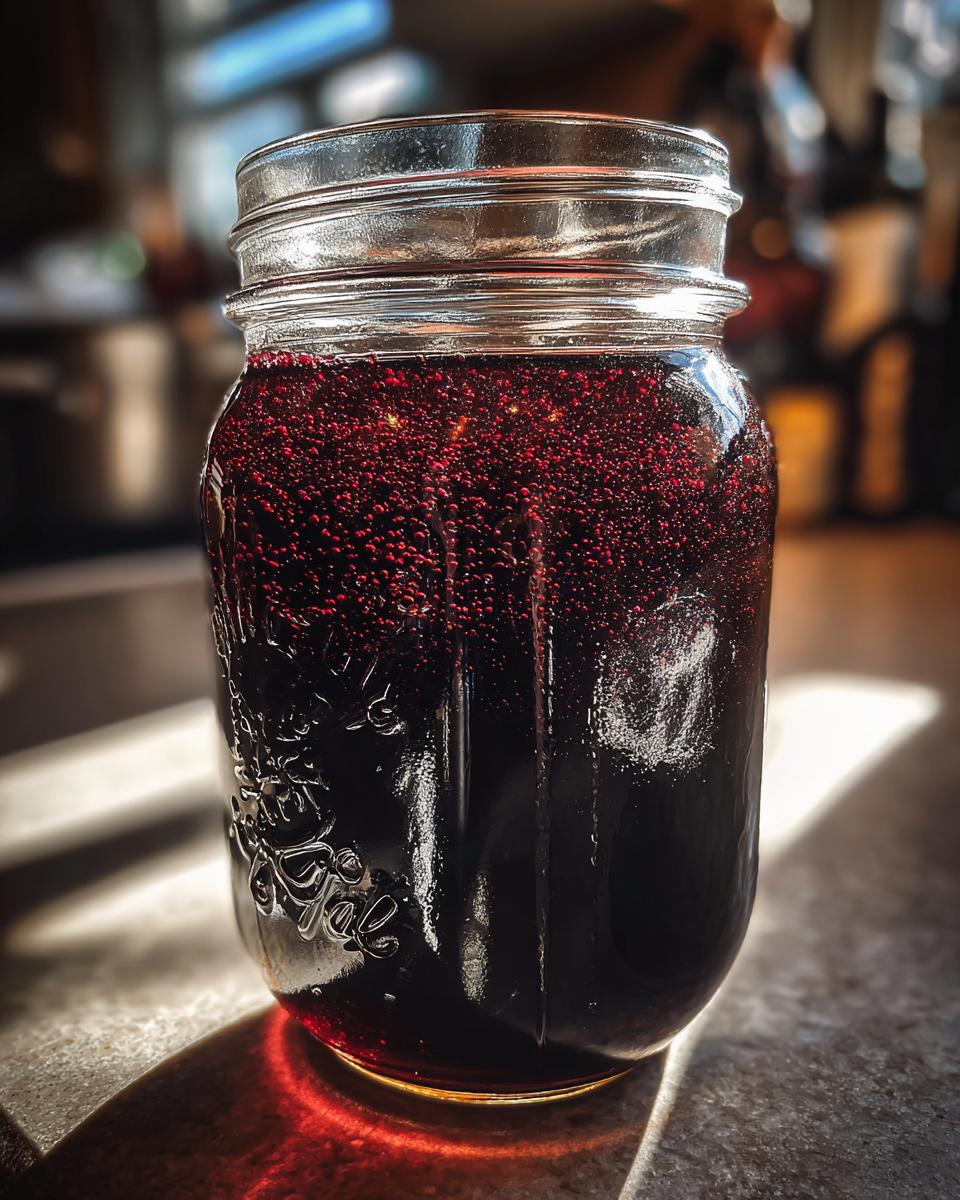
Once your strained elderberry liquid is warm to the touch (think comfortable bathwater temperature!), it’s time for the honey. Pour in your cup of raw honey and stir it gently until it’s completely dissolved and blended in. It should look beautifully smooth and golden. Then, carefully pour your finished elderberry syrup into a clean glass jar or bottle. Pop a lid on it and store it right there in your refrigerator. It’s usually good for a few weeks this way, ready whenever you need a little boost!
Frequently Asked Questions about Elderberry Syrup
Got questions about this homemade elderberry syrup? I get it! It’s always good to know the nitty-gritty when you’re making something for your health. Here are a few things people often ask me about my elderberry syrup recipe.
How much elderberry syrup should I take daily?
That’s a great question! For adults, a good starting point is usually about 1 tablespoon a day. For kids, maybe 1 teaspoon. But remember, I’m a chef, not a doctor! This isn’t medical advice, so if you’re feeling unwell or have specific health concerns, it’s always best to chat with your healthcare provider. This syrup is more about general wellness and support!
Can I use fresh elderberries instead of dried for my elderberry syrup?
Oh, please, please, please stick to dried elderberries for this recipe! I know fresh looks so pretty, but the raw berries and seeds from fresh elderberries can actually cause stomach upset and nausea if they aren’t cooked *perfectly*. Dried elderberries are much safer and give you that concentrated flavor we want in our elderberry syrup without any worry. So, dried is the way to go!
How long does homemade elderberry syrup last in the refrigerator?
When you store your beautiful homemade elderberry syrup in a clean, airtight glass jar in the fridge, it usually stays good for about 2 to 3 weeks. I like to make a fresh batch every few weeks, especially during the colder months. It’s always better to use it up when it’s fresh!
What are the main health benefits of elderberry syrup?
People have used elderberries for ages as a natural remedy, and for good reason! The main draw is their immune-boosting properties, making this elderberry syrup a popular natural cold remedy. The combination of elderberries, ginger, and cinnamon in this recipe is great for supporting your body, especially when you feel a sniffle coming on. It’s like a little hug in a jar!
Serving and Storage Tips for Your Elderberry Syrup
Now that you’ve made this gorgeous elderberry syrup, you’re probably wondering how best to enjoy it and keep it fresh. It’s so versatile, and I love finding new ways to use it!
Delicious Ways to Enjoy Your Elderberry Syrup
Seriously, this stuff is liquid gold! My favorite way to take my daily dose is stirred into a warm cup of herbal tea – it’s so comforting. But don’t stop there! It’s also amazing swirled into plain yogurt or Greek yogurt, drizzled over pancakes or waffles, or even mixed into smoothies for a fruity, spicy kick. It works wonderfully as a natural sweetener in all sorts of things!
Proper Storage and Reheating of Elderberry Syrup
Once your elderberry syrup is all cooled and ready, pour it into a clean glass jar or bottle with a tight-fitting lid. Keep it in the refrigerator, and it should stay lovely for about 2 to 3 weeks. I usually just take a spoonful straight from the fridge. You don’t need to reheat it, and honestly, it’s best served cold or at room temperature anyway. Just scoop and enjoy!
Variations and Creative Uses for Elderberry Syrup
While this elderberry syrup recipe is absolutely perfect as is, sometimes it’s fun to play around and make it your own! I love how adaptable it is. You can totally tweak it to suit your taste or what you have on hand. It’s like having a little magic potion that you can personalize!
Spicing Up Your Elderberry Syrup
Want to give your elderberry syrup an extra little something? You can totally do that! For an even warmer, more complex flavor, try adding a star anise pod or a few green cardamom pods along with the cinnamon and cloves. They add such a lovely aroma. Or, for a brighter, fresher note, stir in a little bit of orange or lemon zest right at the end, with the honey. It gives it a lovely citrusy lift that’s just delightful, especially when you’re using it in drinks!
A Chef’s Touch: My Journey with Elderberry Syrup
You know, back home in Valencia, my family always had natural remedies for everything. It was just part of life, like the smell of oranges in the air! When I first started experimenting with elderberry syrup, it felt like I was reconnecting with those roots. There’s something so grounding about making something so good for you from scratch. It reminds me of my grandmother, always in the kitchen, whipping up little concoctions. This elderberry syrup recipe, for me, isn’t just about health; it’s about tradition, about bringing that sense of home and care into my cooking, and sharing it with you all.
Share Your Elderberry Syrup Creations!
I absolutely love hearing from you! Have you tried making this elderberry syrup? I’d be thrilled if you shared your experience in the comments below. Did you discover any fun variations or have tips to add? Let me know how your homemade elderberry syrup turned out – I can’t wait to see!
Print
Amazing Elderberry Syrup: 9 Boosts
- Total Time: 55 minutes
- Yield: Approximately 2 cups 1x
- Diet: Vegetarian
Description
Learn how to make a delicious and healthy elderberry syrup at home. This easy recipe is perfect for boosting your immune system, especially during cold and flu season. Carmen Velasco shares her simple method, perfect for a natural wellness remedy.
Ingredients
- 1 cup dried elderberries
- 3 cups water
- 1 cup raw honey
- 1 cinnamon stick
- 3 whole cloves
- 1 inch fresh ginger, sliced
Instructions
- Combine elderberries, water, cinnamon stick, cloves, and ginger in a saucepan.
- Bring to a boil, then reduce heat and simmer for 30-45 minutes, or until the liquid has reduced by about half.
- Remove from heat and let steep for another 10-15 minutes.
- Strain the mixture through a fine-mesh sieve, pressing gently on the solids to extract as much liquid as possible. Discard the solids.
- Let the liquid cool until it is warm, not hot.
- Stir in the honey until well combined.
- Pour the syrup into a clean glass jar and store in the refrigerator.
Notes
- Use dried elderberries as fresh ones can be toxic.
- Ensure the syrup cools before adding honey to preserve its beneficial properties.
- This syrup can be a thoughtful homemade gift.
- Prep Time: 10 minutes
- Cook Time: 45 minutes
- Category: Syrup
- Method: Stovetop
- Cuisine: Spanish-inspired
Nutrition
- Serving Size: 1 tablespoon
- Calories: 60
- Sugar: 15g
- Sodium: 0mg
- Fat: 0g
- Saturated Fat: 0g
- Unsaturated Fat: 0g
- Trans Fat: 0g
- Carbohydrates: 15g
- Fiber: 1g
- Protein: 0g
- Cholesterol: 0mg
Keywords: elderberry syrup, homemade elderberry syrup, immune support, natural remedies, honey, ginger, cold and flu prevention, DIY wellness