 Skip to content
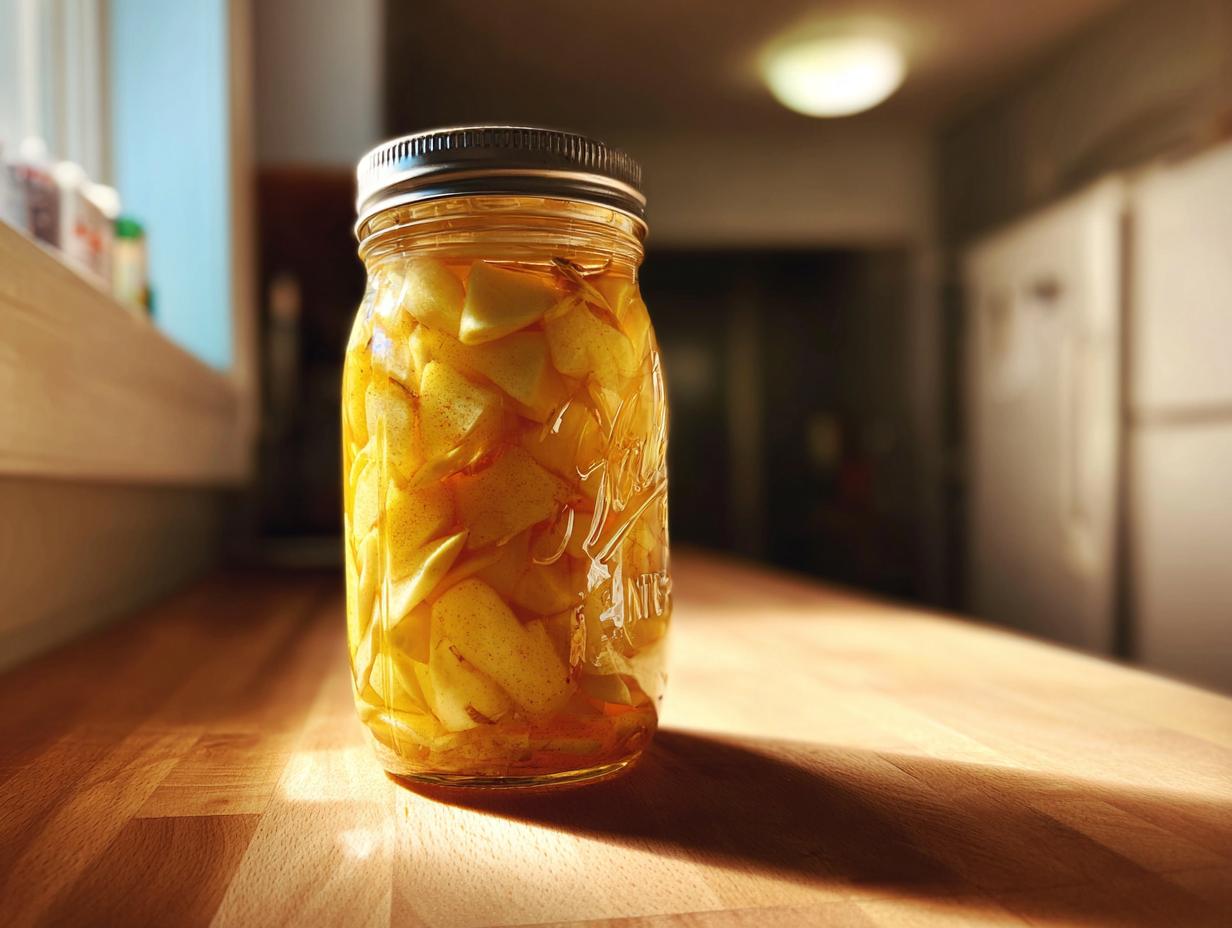
Hola, friends! Carmen here, all the way from sunny Valencia, Spain. You know, even though we’re known for our paella and oranges, there’s something so wonderfully cozy about a jar of perfectly preserved apples. I remember my abuela teaching me the magic of canning apples, turning a simple harvest into a treasure trove for my kitchen. It’s not just about preserving fruit; it’s about capturing a little bit of sunshine and flavor to enjoy all year round. So, let’s dive into my favorite way to keep those lovely apples ready for anything!
Why You’ll Love Canning Apples
Honestly, canning apples is just one of those kitchen wins that keeps on giving! You’ll love it because:
- It’s surprisingly simple, even for beginners!
- You get wonderfully versatile canned apple slices ready for anything.
- It’s the perfect shortcut for amazing homemade apple pie filling.
- You’re preserving the taste of fall to enjoy whenever you fancy!
Deliciously Versatile Canned Apple Slices
These aren’t just any canned apples, friends! They’re tender, flavorful slices that are just begging to be tossed into your morning oatmeal, layered into yogurt parfaits, or even just eaten straight from the jar. So easy!
Perfect for Homemade Apple Pie Filling
Seriously, if you love apple pie, you NEED this recipe. Having these canned apples on hand means you can whip up a delicious, home-baked apple pie any time the craving strikes. No more waiting for apple season!
Simple Food Preservation Apples Method
I know canning can sound a bit intimidating, but trust me, this method for food preservation apples is super straightforward. We’re talking basic steps and ingredients that lead to perfectly preserved apples, ready for your pantry.
Essential Ingredients for Canning Apples
Alright, let’s talk about what you’ll need to get these beautiful apples into jars. It’s really not much, and the quality of your ingredients makes all the difference, you know? I always go for what’s fresh and firm. You’ll want about 6 pounds of apples – any variety works, but I find the firmer ones hold their shape a bit better. Think Honeycrisp, Fuji, or even a good Granny Smith if you like a little tartness!
For the syrup, which is totally optional if you prefer unsweetened apples, you’ll need 3 cups of water and 1 1/2 cups of granulated sugar. Oh, and if you want that lovely hint of autumn spice, grab 1 teaspoon of ground cinnamon and another teaspoon of lemon juice. The lemon juice is great for keeping the apples bright and fresh, plus it adds a little zing!
Step-by-Step Instructions for Canning Apples
Alright, let’s get down to business! Canning apples might seem like a lot, but if you follow these steps, you’ll have beautiful jars of goodness in no time. Think of it as a little dance in the kitchen, and we’re leading!
Preparing Your Equipment for Canning Apples
First things first, cleanliness is key! You absolutely must wash your jars, lids, and rings really well with hot, soapy water. Rinse them thoroughly. Keeping the jars hot until you’re ready to fill them is super important; it helps prevent them from breaking when you add the hot apples and syrup. I usually just leave them in the simmering water in my canner.
Preparing the Apples for Canning
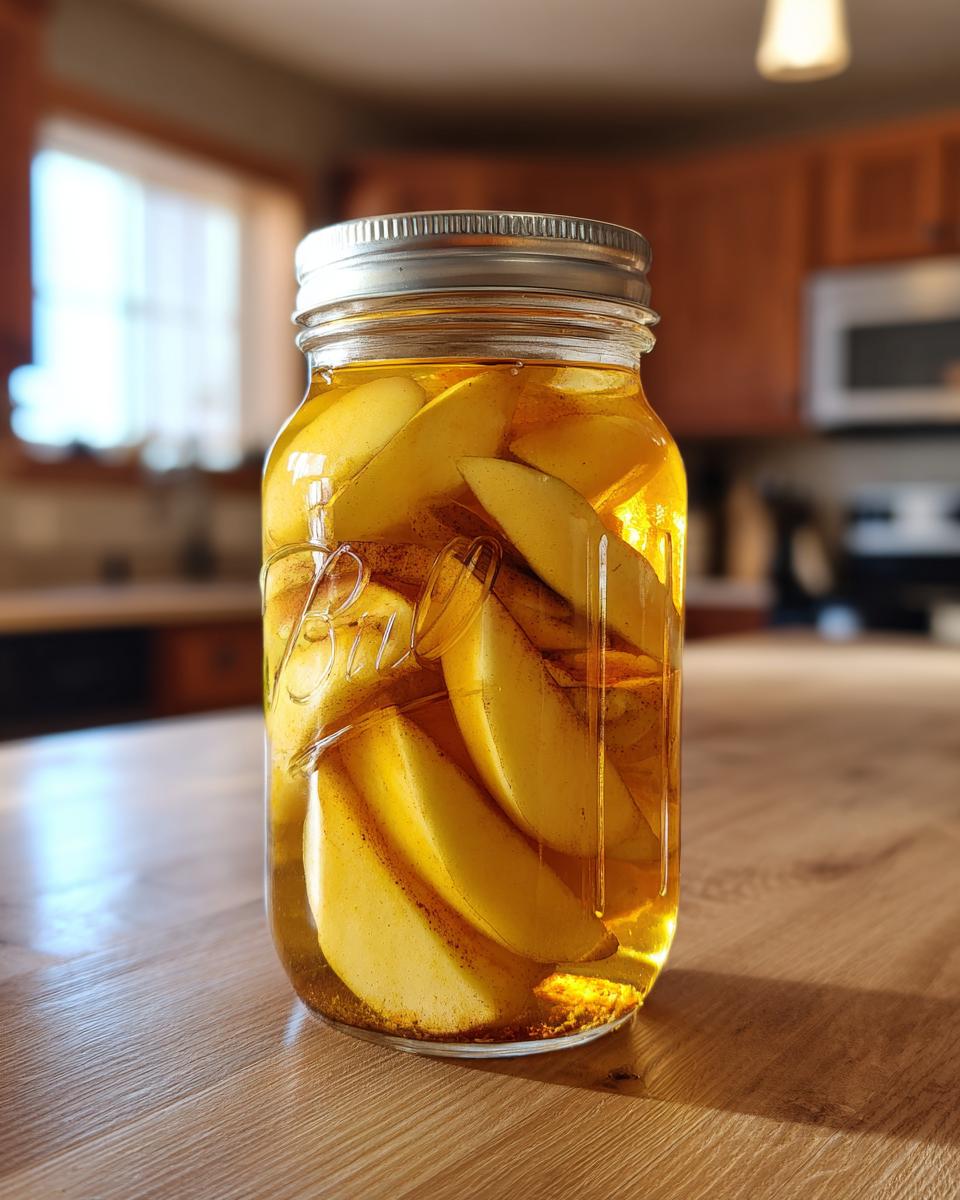
Now for our stars – the apples! Wash them all up, then peel, core, and slice them into nice, even pieces. About half an inch thick is perfect. You want them uniform so they cook evenly. Don’t worry if they’re not all identical; we’re going for rustic charm here!
Making the Canning Syrup
If you’re using syrup, which I usually do for that extra touch of sweetness and to help them keep their shape, it’s really simple. Just combine your 3 cups of water and 1 1/2 cups of sugar in a big pot. Bring it to a rolling boil, stirring until the sugar dissolves. Easy peasy!
Cooking the Apples in Syrup
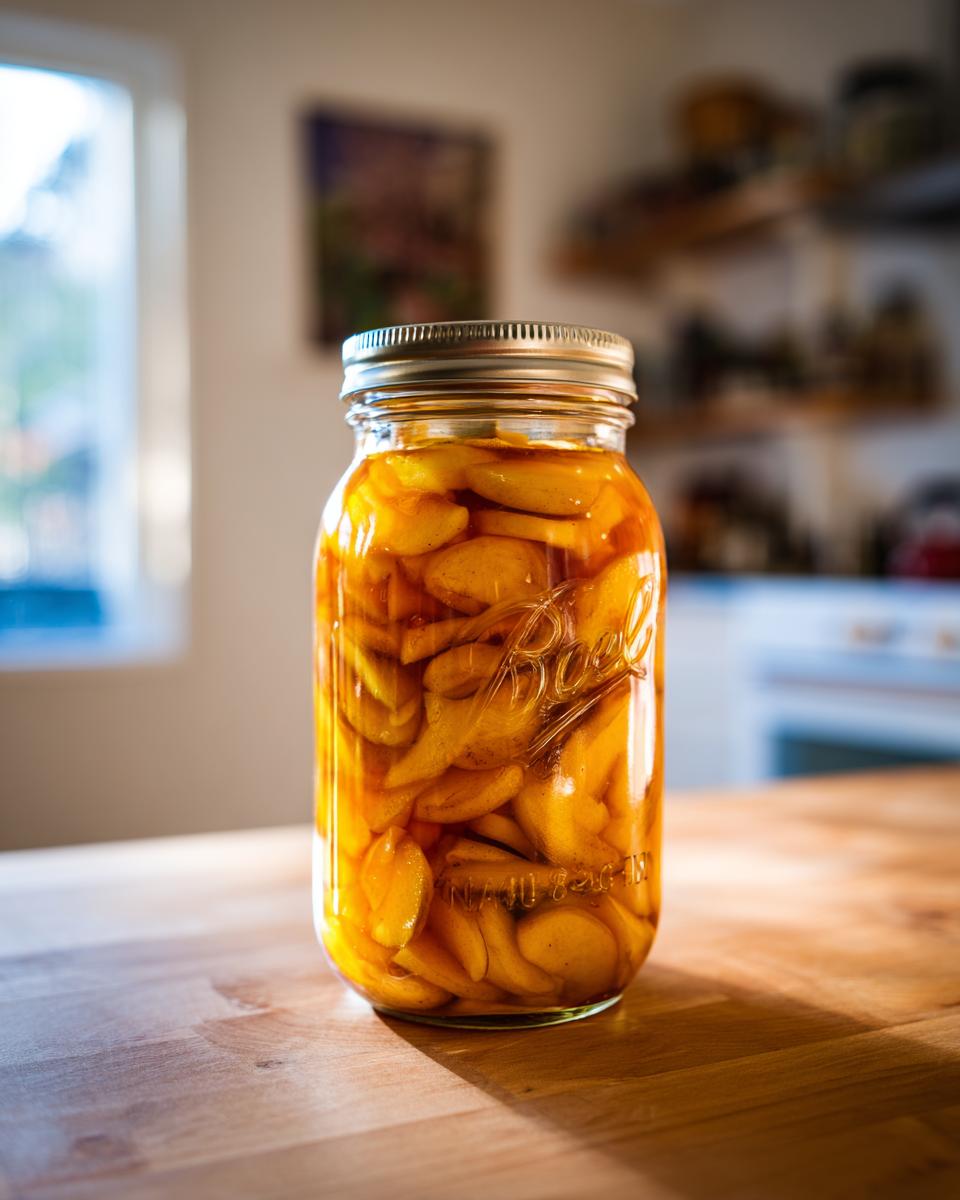
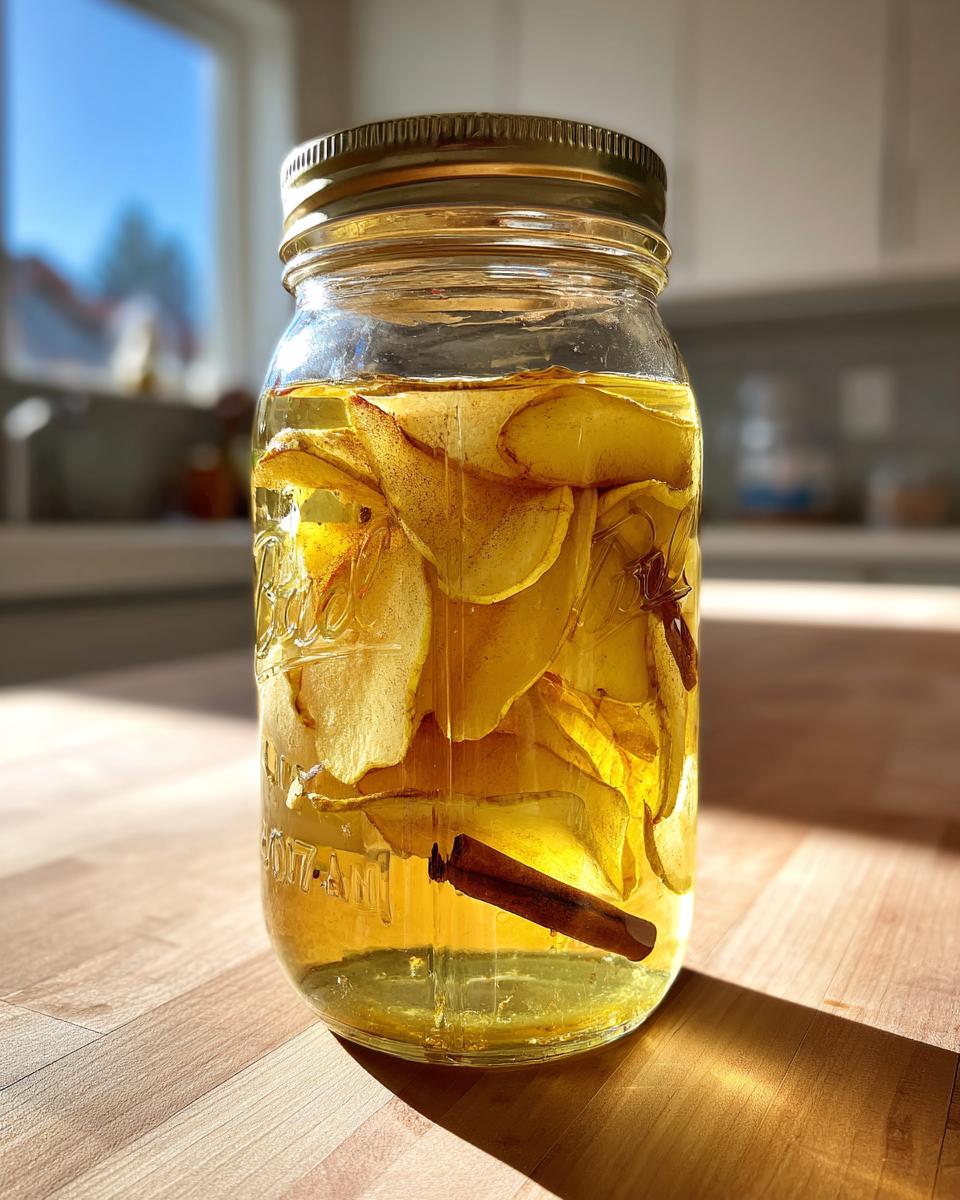
Gently add your prepared apple slices to that boiling syrup. Let them cook for just about 5 minutes, stirring carefully so you don’t mash them up. This is when you’ll stir in your cinnamon and lemon juice if you’re using them. It just adds that perfect little something!
Packing Jars for Canning Apples
Time to fill those hot jars! Carefully pack the hot apple slices into your hot jars. You need to leave about a half-inch of space at the top – that’s called headspace, and it’s really important for a good seal. Then, ladle that hot syrup over the apples, making sure you keep that half-inch headspace. Use a non-metallic spatula, like plastic or wood, to run around the inside edge of the jar. This gets rid of any trapped air bubbles.
Processing and Sealing Your Canned Apples
Wipe those jar rims clean with a damp cloth – any sticky bits can mess with the seal. Pop the lids on and screw the rings down until they’re just fingertip tight. Don’t crank them on there! Then, carefully place the jars into your boiling water canner. Process pints for 20 minutes, or quarts for 25 minutes. Make sure the water is boiling the whole time! Once done, carefully lift the jars out and let them cool undisturbed on a towel-lined counter for about 12 to 24 hours. You’ll hear them ping as they seal – it’s the best sound!
Tips for Successful Canning Apples
Now, let me share a few little secrets from my kitchen that make all the difference when you’re canning apples. It’s all about those small details that ensure your jars turn out perfectly, bursting with flavor and ready for anything!
Selecting the Best Apples for Canning
When you’re picking out your apples, try to grab ones that are firm and ripe, but not mushy. Varieties like Fuji, Gala, or Honeycrisp are wonderful because they hold their shape beautifully after canning. If you like a little tartness, a Granny Smith is also a great choice!
Sweetness and Flavor Adjustments
Don’t be afraid to play with the syrup! If you prefer less sweet apples, just cut back on the sugar or even omit it entirely. I sometimes add a little extra cinnamon or even a pinch of nutmeg to my syrup, especially when I know I’ll be using them for pie filling later on.
Ensuring Safe Food Preservation Apples Practices
Remember, safety first with canning! Always make sure your jars have that half-inch headspace, and that your lids are fingertip tight. And don’t skimp on the processing time in the boiling water bath – it’s crucial for making sure your apples are properly preserved and safe to enjoy. For more on safe canning practices, you can check out resources from the Minnesota Department of Health.
Frequently Asked Questions About Canning Apples
Got questions about canning apples? That’s totally normal! It’s great you’re thinking through all the details. Here are a few things people often ask me.
Can I Can Apples Without Sugar?
Absolutely! If you prefer unsweetened apples, you can simply skip the sugar in the syrup. Just pack your apples into the jars and cover them with plain boiling water instead. They’ll still be delicious and perfect for savory dishes or recipes where you control the sweetness!
What are the Best Apples for Canning?
I find that firmer apples work best because they hold their shape so nicely. Think Fuji, Gala, Honeycrisp, or even Granny Smith if you like a bit of tartness. Softer apples can get a little mushy, but they’ll still taste great, especially if you’re making applesauce!
How Long Can I Store Canned Apples?
Properly sealed jars of canned apples can last for about a year, maybe even a little longer if stored correctly. Keep them in a cool, dark place, away from direct sunlight. They’ll still be safe after a year, but the quality might start to decrease a bit.
Storing and Reheating Your Canned Apples
Once your beautiful jars of apples have cooled and sealed perfectly – that satisfying ‘ping’ means they’re ready! – it’s time to find them a good home. Store them in a cool, dark place, like a pantry or cupboard. Avoid places with extreme temperature changes. To reheat, just pop them into a saucepan with a splash of water or the canning liquid and warm gently over medium-low heat until they’re tender and ready to use in pies, oatmeal, or wherever your heart desires!
Print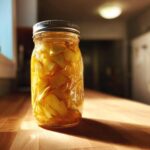
Canning Apples 5 Delicious Ways
- Total Time: 60 minutes
- Yield: Approximately 4-5 pint jars 1x
- Diet: Vegetarian
Description
Learn how to can apples with Carmen Velasco, a chef from Valencia, Spain. This guide provides simple recipes and essential tips for preserving fresh apples, perfect for homemade apple pie filling, applesauce, or preserves.
Ingredients
- 6 pounds apples, any variety
- 3 cups water
- 1 1/2 cups granulated sugar (optional, for syrup)
- 1 teaspoon ground cinnamon (optional)
- 1 teaspoon lemon juice (optional)
Instructions
- Prepare your canning jars, lids, and rings. Wash them thoroughly in hot, soapy water and rinse. Keep jars hot until ready to fill.
- Wash, peel, core, and slice the apples into uniform pieces (about 1/2 inch thick).
- In a large pot, combine water and sugar (if using) to make a light syrup. Bring to a boil.
- Add the apple slices to the boiling syrup. Cook for 5 minutes, stirring gently.
- Add cinnamon and lemon juice (if using) and stir.
- Carefully pack the hot apple slices into hot canning jars, leaving a 1/2-inch headspace.
- Ladle the hot syrup over the apples, maintaining the 1/2-inch headspace. Remove air bubbles by sliding a non-metallic spatula around the edges of the jar.
- Wipe the jar rims clean with a damp cloth and place the lids on the jars. Screw on the rings until fingertip tight.
- Process the jars in a boiling water canner for 20 minutes for pints or 25 minutes for quarts. Adjust processing time for altitude if necessary.
- Remove jars from the canner and let them cool undisturbed on a towel-lined counter for 12-24 hours. Check seals before storing.
Notes
- Choose firm, ripe apples for best results.
- Adjust sugar content to your preference or omit for unsweetened apples.
- Ensure proper headspace and processing times for safe canning.
- Store sealed jars in a cool, dark place.
- Prep Time: 30 minutes
- Cook Time: 30 minutes
- Category: Preserves
- Method: Boiling Water Bath Canning
- Cuisine: General
Nutrition
- Serving Size: 1 cup
- Calories: 150
- Sugar: 30g
- Sodium: 5mg
- Fat: 0g
- Saturated Fat: 0g
- Unsaturated Fat: 0g
- Trans Fat: 0g
- Carbohydrates: 40g
- Fiber: 3g
- Protein: 0g
- Cholesterol: 0mg
Keywords: canning apples, how to can apples, apple canning recipes, canned apple slices, homemade apple preserves, easy apple pie filling canning, fall canning ideas, canning apple sauce, apple jam recipe canning, food preservation apples, seasonal apple canning tips